Report Menu - Group Expert
The Group Expert can be launched from the 'Report' menu or by clicking the appropriate button in the button bar.
In order to make complex reports more readable, the information can be split into groups. By adding a new Group to the report, two extra sections are added: a 'Group Header' and a 'Group Footer'.
For each group, a 'Group Name Field' is created. The 'Group Name Field' has, by default, the same value as the field upon which the grouping takes place, for instance, customer number. However, it is also possible to assign another value to it, such as the customer name or the result of a function.
Grouping can be based on a database field or a function.
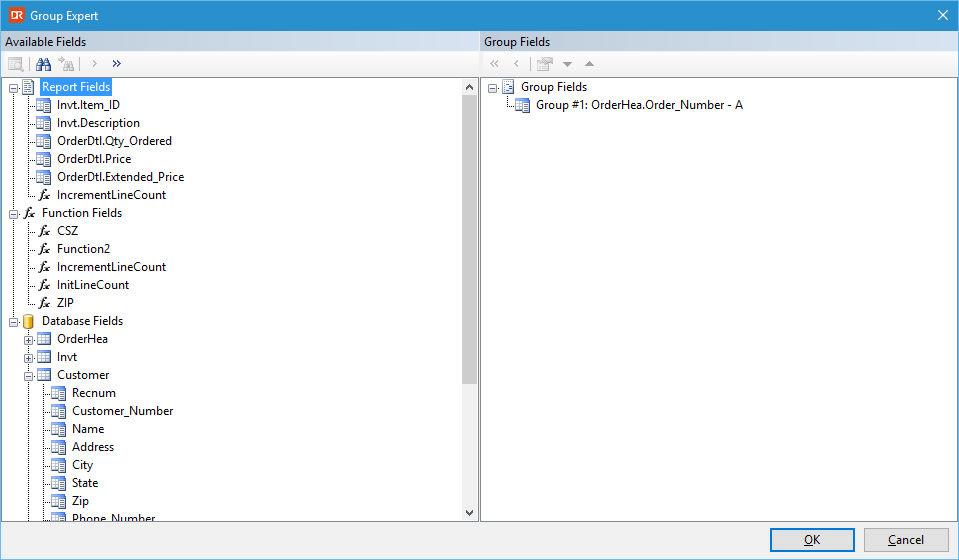
Adding a group starts with selecting a database or function field in the available fields tree view. The tree view shows three top levels: - Report fields: showing the database fields that are used in the report - Function Fields: showing the function fields defined in the report - Database fields: showing all tables and fields
Click on the 'Browse Data' button in the button bar at the top of the tree view to inspect the content of a selected field.
By clicking the 'Find Field' button, a field name can be found. This is particularly useful if the tree view contains many entries.
After selecting a database or function field, a Group can be added to the report by clicking the button with the single arrow pointing to the right.
Removing a group works in a similar fashion: select the Group and then click the button with the single arrow pointing to the left. Note that fields placed in the group header or footer will be removed from the report.
An additional group is placed under the already existing groups. The order in which the groups appear can be changed by selecting a group and then clicking the 'Up' or 'Down' button.
If a group is selected, clicking the 'Properties' button shows the panel for the settings for that Group.