Web Mobile Applications
Start the Wizard
To start the wizard, go to the File menu and choose the 'New' option followed by the 'Web Object' option. The dialog to select from looks like:
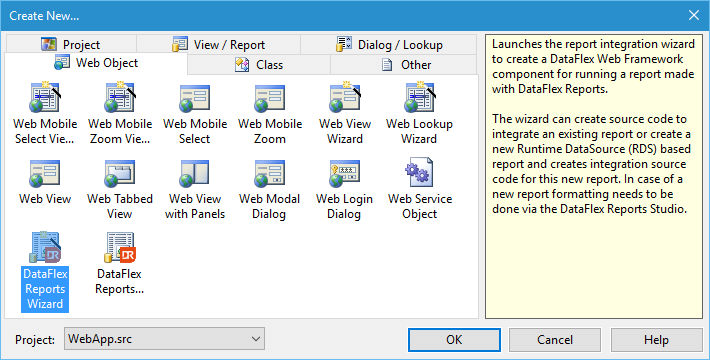
For the explanation of the wizard that follows, it is assumed that:
- The 'WebOrderMobile' workspace is selected.
- The DataFlex Reports library is added to that workspace.
- A simple report, named
CustomerList.dr, was created with DataFlex Reports in the Reports folder showing customer data. A report with this name is present. - The Web project (
WebApp.src) is selected in the workspace.
The first window explains the function of the wizard. Click 'Next' to proceed.
Existing or New Report
On the next page, you can connect to an existing report or create a new RDS (Runtime Data Source) based report. For now, select 'Connect to an existing report'.
Select Report
On the next page, select the report named CustomerList.dr.
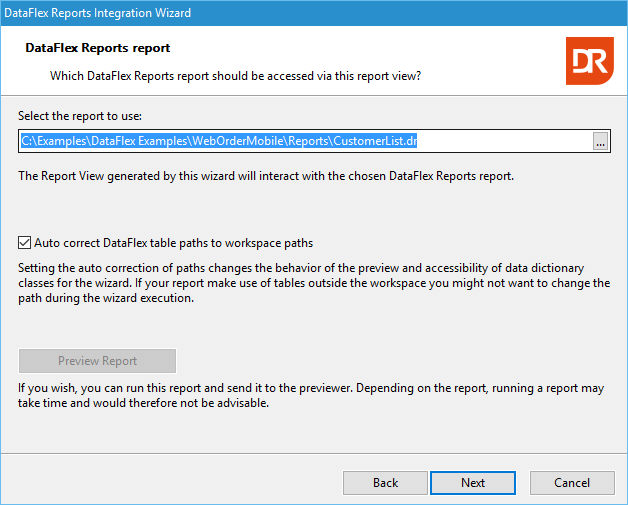
The wizard looks in a folder named Reports, but the browse button can be used to select a report from another folder. Selecting a report from another folder impacts the functionality of the wizard and the integration library. If the report is based on tables of the DataFlex embedded database, paths to the database or individual tables can be automatically corrected to the workspace paths. Select the checkbox "Auto correct DataFlex table paths to workspace paths" if this is desired. It should not be selected if the report contains tables that are not present in the workspace without developer coding. In such a case, it might be necessary to write your own code to connect the report to data. If the data is retrieved from an ODBC or RDS data source, this option has no meaning. The preview button can be used to preview the report to discover if the correct report was selected. Running a report without selection criteria might take a while, and previewing should not be chosen.
It is not possible to continue if the report was not created with the same version of the installed DataFlex Reports OCX. An error as shown here will be presented.
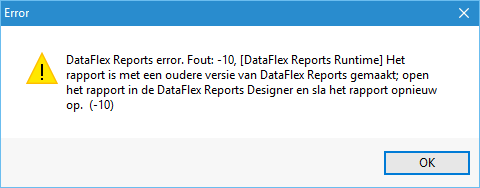
In such a case, the report needs to be opened in the DataFlex Reports designer and saved to disk.
Webview Style
In the next wizard page, select "Drilldown - Mobile/Touch" for the webview style.
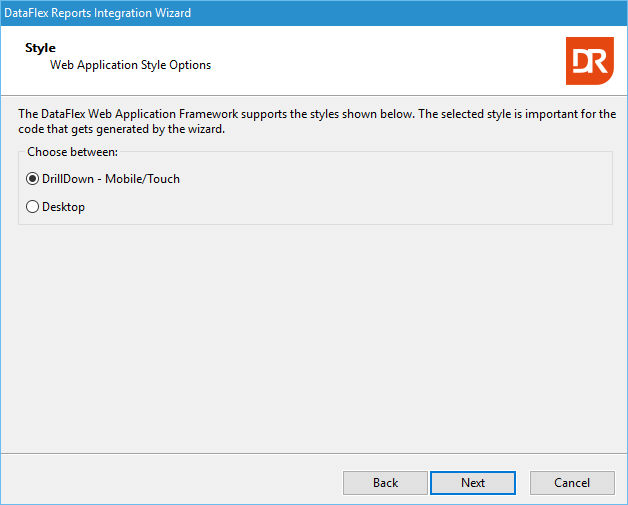
Based on the selected style, the wizard generates different source code. While combining "Desktop" and "Drilldown - Mobile/Touch" webviews is possible within one project, it is easier and better to select the component style that matches the application style.
Selection Criteria
The next step in this integration example is about the creation of selection criteria input controls.
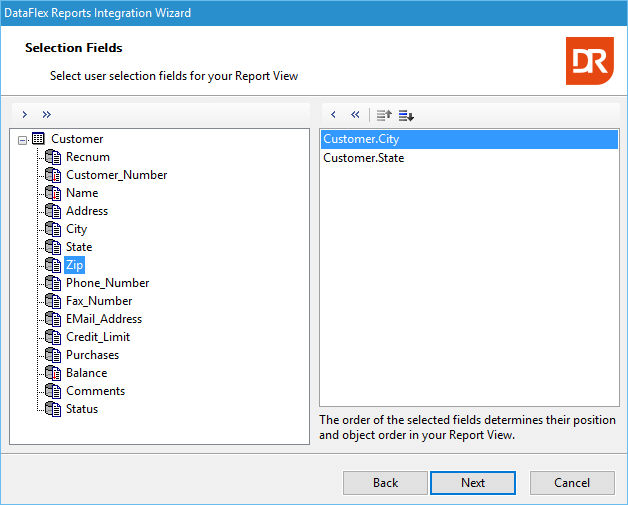
Selection criteria can be hard-coded, or a user can be allowed to enter the criteria values. As shown, select the 'City' and 'State' columns.
The wizard generates input controls to enter these filter values.
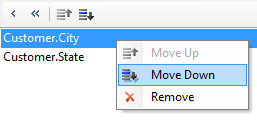
The order of the input controls can be changed via right mouse click as shown in the above image.
Report Filters
The next wizard page depends on the report definition. If the report contains a filter (expert and/or filter function), the next wizard page(s) show the filters. Editing of the filter is not possible; selecting to keep or remove the filters can be done via the radios below the grid.
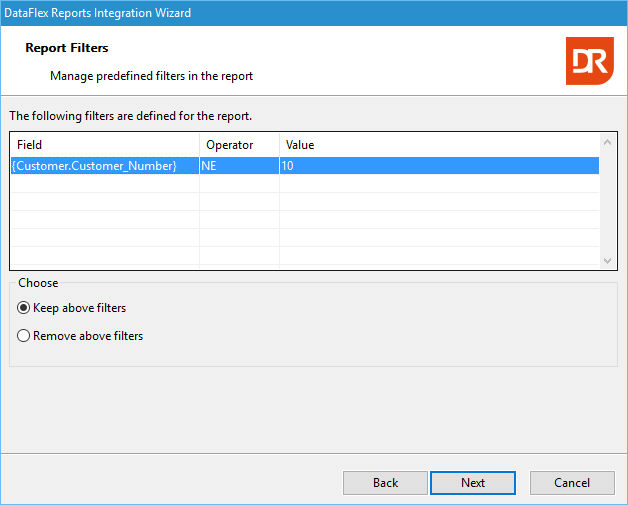
The screenshot shows a filter on the customer_number column, and all rows not equal to the value of 10 are valid.
Keeping the filter definitions results in a report that filters the data on the predefined filter plus the values from the selection input controls.
Parameters
If the report contains parameters, a page will be shown with the parameters.
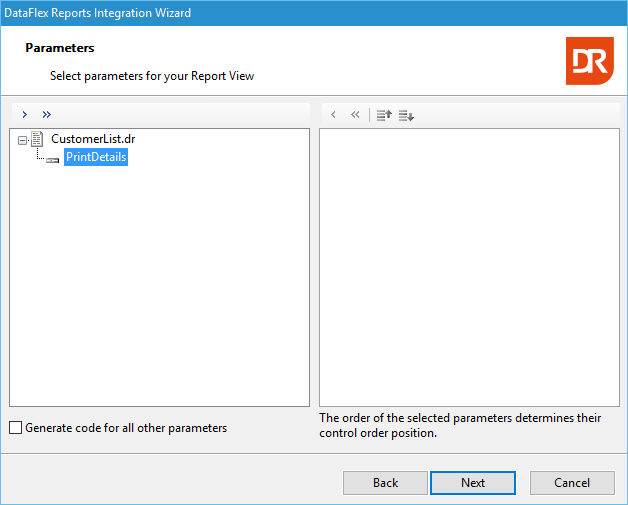
One or more parameters can be selected for the creation of an input control.
A checkbox below the list of parameters makes it possible to ask the wizard to generate source code for the parameters that were not selected. Via source code, these parameters can be given a value.
Read more about the use of parameters.
The customerlist.dr report does not contain parameters.
An input control will be generated for each of the selection and/or parameter fields.
Labels, Justification and Position
The generated label for the input control can be changed in the labels and alignment wizard page. The page is only available if there are selection or parameter input controls to be created.
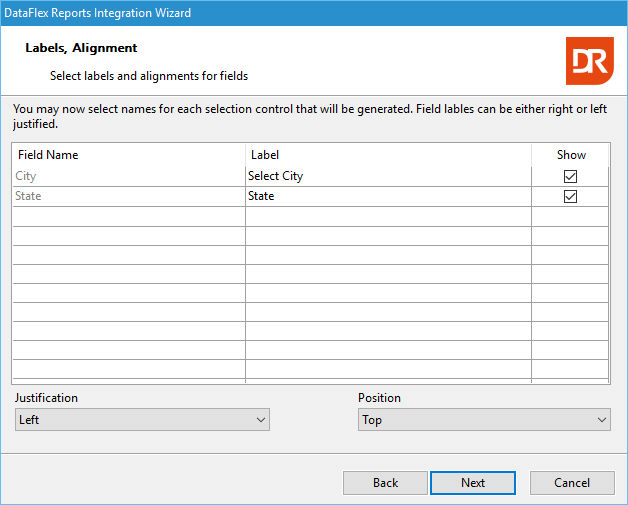
The 'Show' checkbox for each label allows you to generate the label setting but hide the appearance.
Make your choice for the label justification mode and the label position from their drop-downs at the bottom of the page.
Filter Operator
This wizard pageâ€â€only available if fields for selection criteria have been chosenâ€â€allows you to choose the filter operator and whether the wizard should create one of two input controls. In most cases, only one selection criteria is enough.
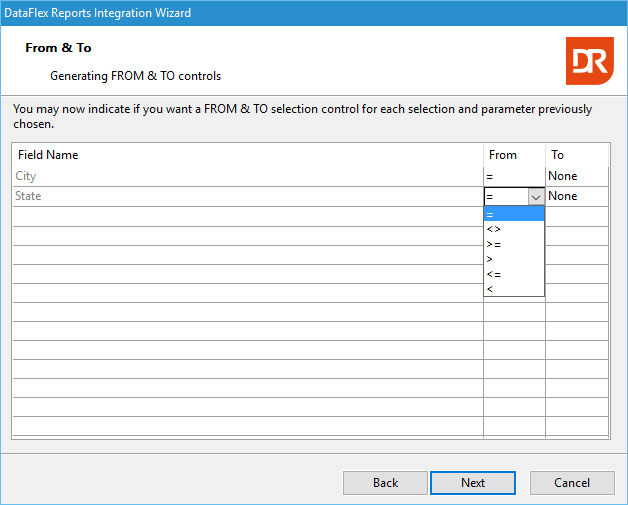
Accept the defaults or change the filter operator for each of the selection fields. Selecting a 'to' selection creates two input controls, and the choice of available operators will be based on the 'from' selection.
Select & Zoom Views
A typical DrillDown - Mobile/Touch application usually contains select and zoom webviews.
Based on the number of selection criteria, the wizard makes it possible to connect one or more selection criteria to existing 'Select' views or to create a new 'Select' view. The connect-to or creation of a select view is present to help the user create a useful filter value.
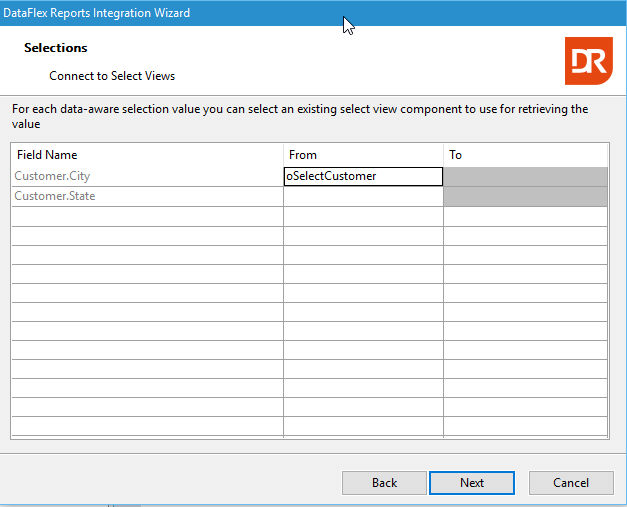
The screenshot above shows the 'to' column is unavailable. This is because in the previous wizard page, only a 'from' selection criteria was chosen.
Clicking the prompt button in the 'From' column brings up a Windows file selector dialog. Select the webview component that can be used to get the selection criteria from.
If there was only one selection field chosen, the wizard page would look like:
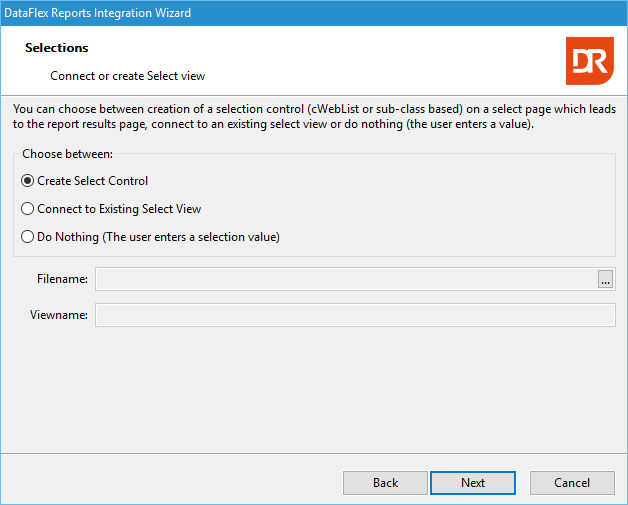
The first option lets the wizard create a cWebList control. Use this if there is not a select view page available yet or if this page should be different. Enhancements to the list can be made after the select view page is created by the wizard.
The second option allows you to connect to an existing select view.
The third option tells the wizard to create an input control without connections to a select view page. The created page will be very light as it will only contain one input control. Further enhancement of the page is suggested.
Sort Order
After clicking 'Next', the wizard allows you to set the sort order of the data displayed in the details section of the report.
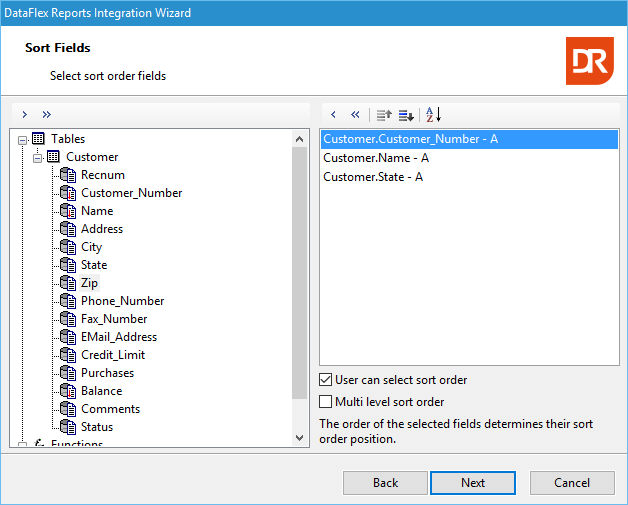
The wizard shows the record sort order defined in the report, if any.
With a right mouse click, the sort direction (ascending or descending) can be selected per column. The floating menu also makes the sort order changeable.
With the checkboxes underneath the selected sort columns list, it is possible to indicate that code needs to be written that allows the user to change the sort order and whether this is a single sort order or a multi-column sort order.
Functions
The next step in the wizard depends again on the report. If the report or one of the sub-reports contains user-defined functions, the wizard shows these functions.
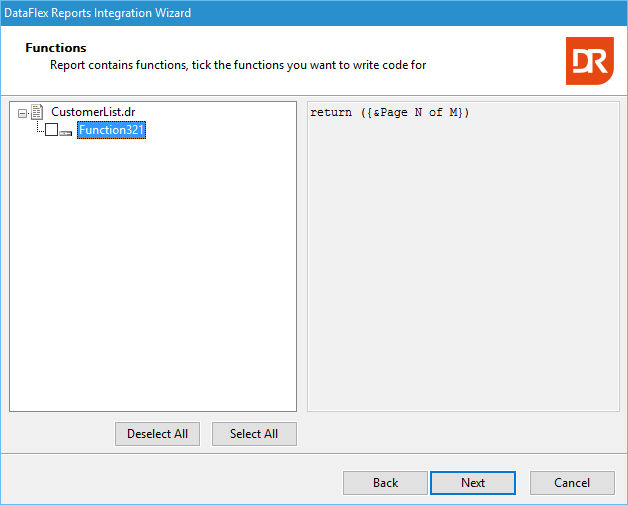
Each of the functions can be inspected and selected for code generation.
Functions that are designed to have a different value than entered during report creation can be changed via source code.
The customerlist.dr report contains one function that should not be changed at the integration level.
Report View Options
The next step in the integration process is the selection of the output representation. DataFlex Reports can output to PDF, HTML, four image formats, XLS/XLSX, RTF (Word), and CSV. All formats are supported at the integration level.
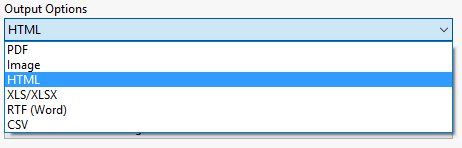
HTML is the default output option for DrillDown - Mobile/Touch style applications.
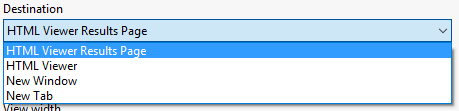
With each of the output options, different destination options become available. For example, with HTML, the output can be shown in an HTML previewer control on a 'Results' page or in the 'Select' page. The wizard generates two web components in case of the 'HTML Viewer Results Page' destination option.
A web report view contains a column layout. The value for the number of columns in the web view can be entered. The default is 10 and is usually acceptable. The value can be changed later in the DataFlex Studio.
Optionally, a view width can be entered. No value means full width of the browser.
Names
When the user can enter selection criteria, a sort order, or parameter values, the wizard creates two web components: a select and a results page. If there is no UI, only one component will be created.
In the next wizard page(s), the object name of the web component, the name of the source file on disk, and a description can be entered. The default values shown are based on the name of the selected and opened report.
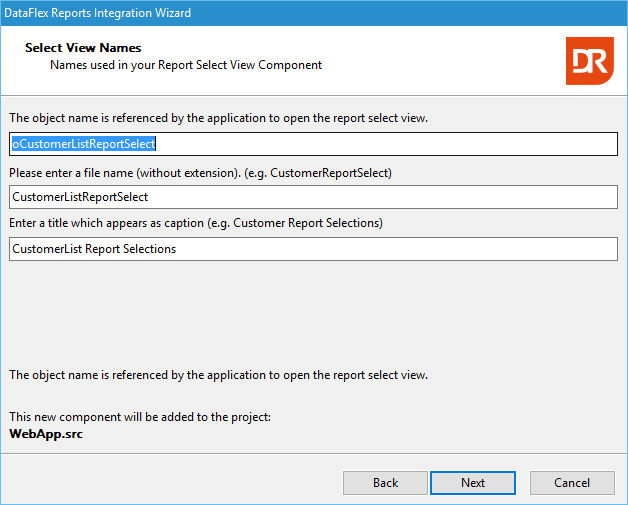
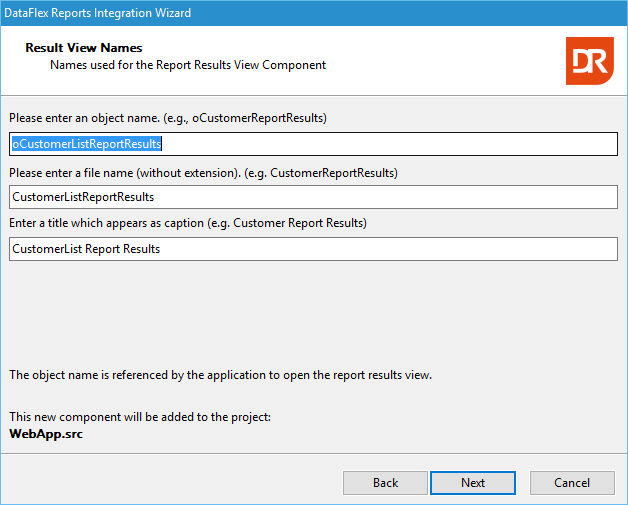
A confirmation question pops up if there is already a file with the entered name.
The name of the objects needs to be unique in the web project. The wizard cannot check if the names are unique or not.
Printed in bold is shown that this report view will be added to WebApp.src, which is a confirmation that the correct project type was chosen.
Language & ODBC Data-source
In the next step of the wizard, it is possible to choose if an instruction to set a language should be generated for translation of language items such as "Page N of M" into the chosen language.
If the report is based on an ODBC data-source, the 'Generate code for...' checkbox can be selected. This generates a method in the report object in which a change in the data-source can be programmed.
Component Finished
The next step in the process is finishing the wizard and the generation of the source code. The generated code will be loaded in the DataFlex Studio, and the newly generated select component will be added to the web app project and the 'View' pull-down.
Review the generated code and make visual enhancements like reorganizing the input controls.
Take a look at Studio's to-do list panel to resolve the ToDo items created by the integration wizard.
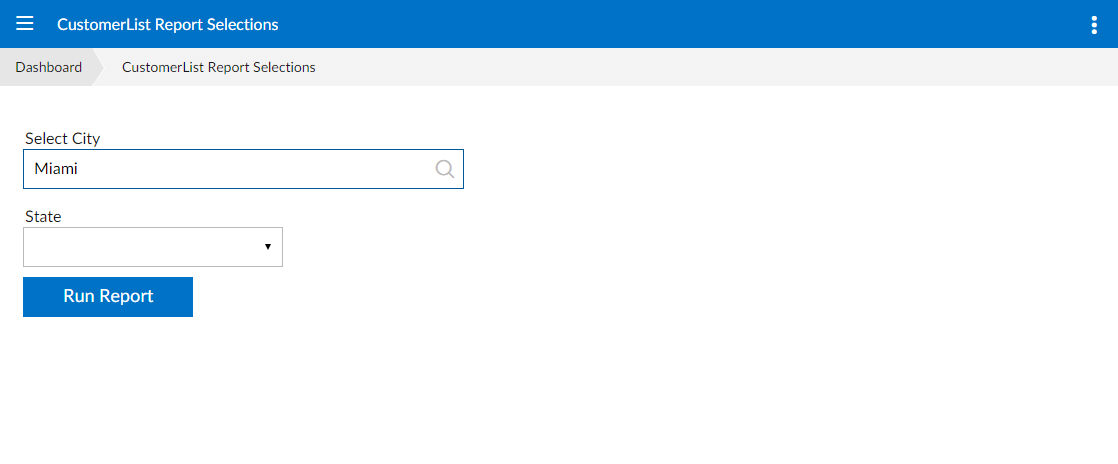
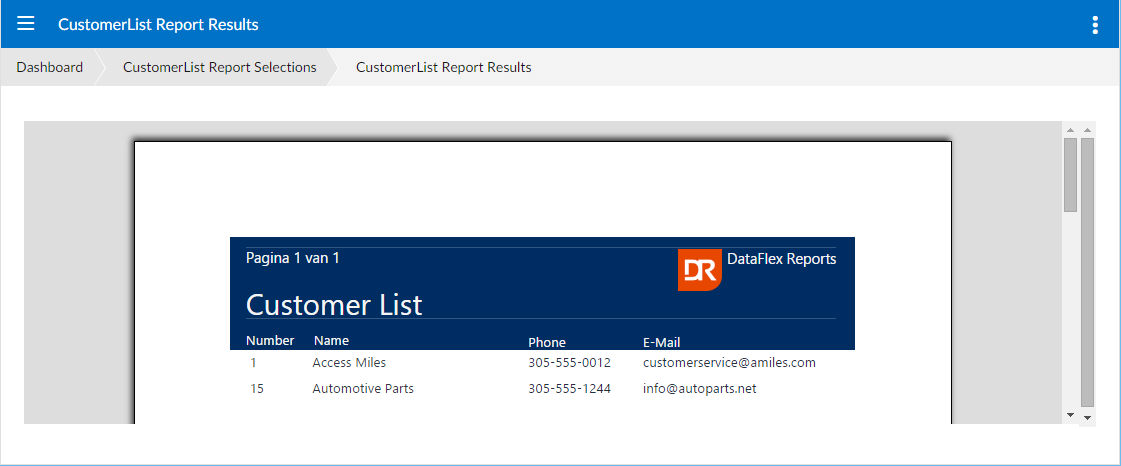
The above screenshot shows the selection criteria for the customerlist report in the browser. Pressing the 'Run Report' button or using the 'Run Report' option from the menu on the right results in: