Creating the Order Header Table
You will now create the Order Header Table for the Order Entry sample application.
-
Click the Create New Table button on the Table Explorer toolbar.
In the Create New Table dialog, typeOrderHeaderas the Table Name and click Ok.
The new table will open in the Table Editor. -
Add columns to the table schema until your column definitions look like those in the image below.

Next, you will add indexes for this table.
- Click on the Add Index toolbar button on the Index tab to add a new index.
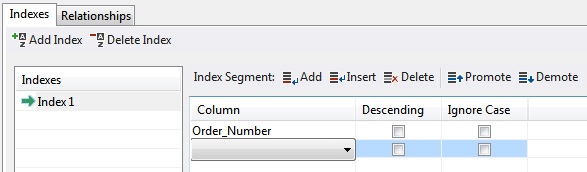
Enter the Segments grid and selectOrder_Numberas the column to add as the first index segment from the combo box. This is the only segment for the first index, meaning that we will never be allowed to have two orders with the same number. This is what we want.
The completed index should look like this:
- Click on the Add Index toolbar button to add index 2. The segments of this index will be
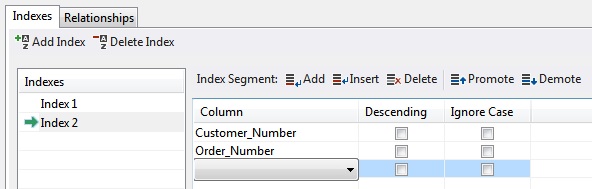
Customer_NumberandOrder_Number.
The completed index should look like this:
- Click on the Add Index toolbar button to add index 3. The segments of this index will be
Order_DateandOrder_Number.
The completed index should look like this:

Next, you will add relationships for this table.
- Click on the Add Relationship toolbar button on the Relationships tab to add a new relationship.
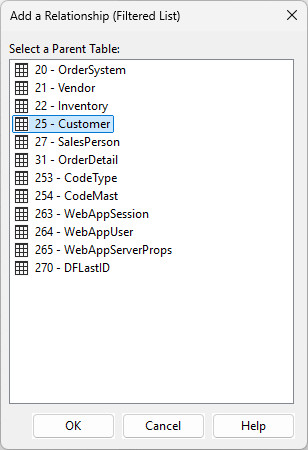
This will open the Add a Relationship dialog.
Select theCustomertable and click Ok.
- In the relationship Column Pairs grid, select
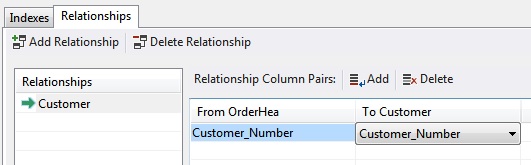
Customer_Numberin the From OrderHeader column andCustomer_Numberin the To Customer column.
The completed relationship should look like this:
-
Click on the Add Relationship toolbar button on the Relationships tab to add another relationship.
This will open the Add a Relationship dialog.
Select theSalesPtable and click Ok. -
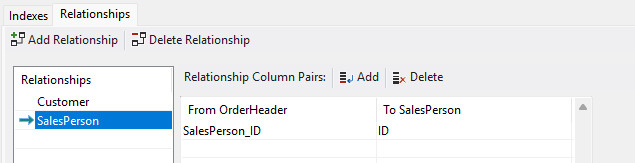
In the relationship Column Pairs grid, select
Salesperson_Idin the From OrderHeader column andIdin the To SalesP column.
The completed relationship should look like this:
-
Click the Save File toolbar button (or press
Ctrl + S) to save the table schema.The Output window will display the results of the save operation.
Note that a Data Dictionary is automatically created when you create a new table (when you save the table the first time).