Creating the Customer Report (WinPrint)
Customer Report (using WinPrint)
You will now create a Customer report using the WinPrint2 Report wizard, following the specifications below. Afterwards, you will learn how to modify a wizard-generated Report View in the Studio.
Creating the User Interface
Our first report sample will be a customer listing based on the cWinReport2 class. This report you are going to build is very similar to the WinPrint report that you built using the WinPrint2 Report wizard in the Creating a WinPrint Report section, but we will make some changes while running the wizard and some more changes in the Studio after the wizard has completed.
- Click on the Create New button on the Studio’s toolbar.
- Click on the View / Report tab of the Create New... dialog.
-
Double-click the WinPrint2 Report Wizard icon.
-
Read the explanations on the first wizard page about what this wizard will do and click Next.
-
On the Names wizard page, enter
CustomerReportas the object name,CustomerReportas the filename, andCustomer Listing (WinPrint 2)as the description, then click Next. -
On the "Main Data Dictionary" wizard page, click on Customer - Customer_DataDictionary to select it as the data dictionary to be used, then click Next.
-
On the "Reporting Order and Breakpoints" wizard page, select index1:Customer_Number as the index to be used, then click Next.
-
On the "Body Section Fields" wizard page, add the following fields by clicking on the Add button:
Customer_NumberNameAddressCityStateZip
Click Next.
- On the "Report Styles and Totals" wizard page, change the name of the
Customer Namefield toNameand adjust the Font Size from10to8. Test run the report. -
Click the X button in the upper right-hand corner of the preview to close the WinPrint report viewer.
-
Back on the "Report Styles and Totals" wizard page, click Next.
-
On the "Filter Fields" wizard page, do not add any fields. Click Next.
-
Click Finish on the last wizard page.
- You should now be back in the Studio, with the newly created report view open in the visual designer.
-
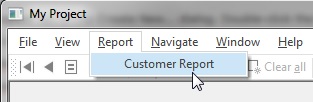
Click on the Run button on the Studio's toolbar. The Studio will compile, then run your project. When the application runs, you will notice that the running application has a Report menu next to the View menu, and it lists your newly created Report View.