Creating a WinPrint Report
Next, you will create a Customer report in the Studio, using the "WinPrint2 Report Wizard".
WinPrint
WinPrint is a reporting tool that is integrated into DataFlex. You can also choose to use other reporting tools with DataFlex, such as the DataFlex Reports or Dynamic AI for web-based reporting.
Tip
Ensure that the Current Project in Workspace Explorer is a Windows Application, not a web application. If you try to create a Windows project component, such as a view, and the current project is a web application, the Studio will display an error message and not allow you to create the component.
The report you will create will be a simple Customer listing.
-
Click on the Create New button on the Studio’s toolbar. Click on the View / Report tab of the Create New... dialog. Double-click the WinPrint2 Report Wizard icon.
-
Read the explanations on the first wizard page of what this wizard will do and click Next.
-
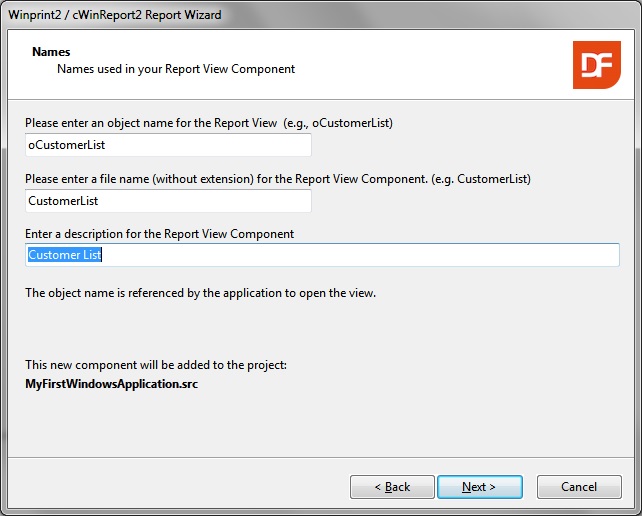
On the Names wizard page, enter
CustomerListas the object name,CustomerListas the filename, andCustomer Listas the description, then click Next.
-
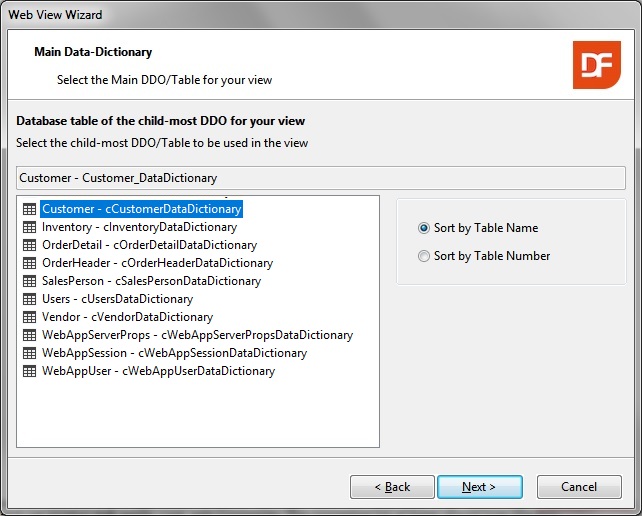
On the "Main Data Dictionary" wizard page, click on CUSTOMER - Customer_DataDictionary to select it as the data dictionary to be used, then click Next.
-
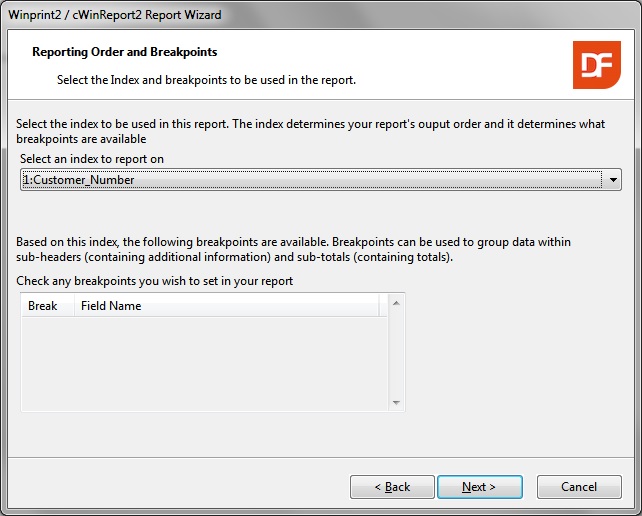
On the "Reporting Order and Breakpoints" wizard page, select index1:Customer_Number as the index to be used, then click Next.
-
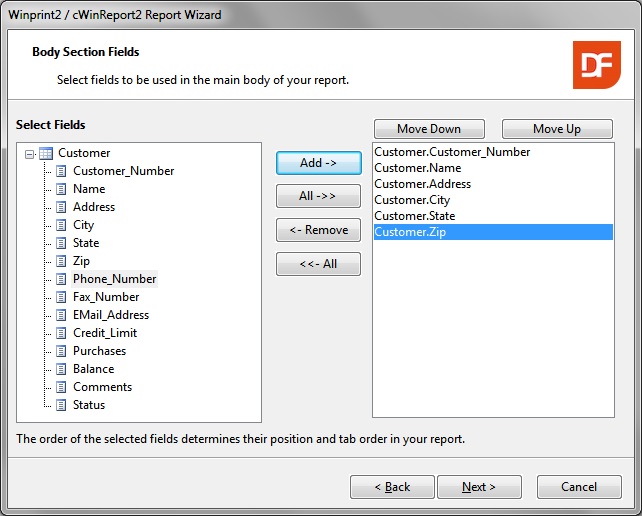
On the "Body Section Fields" wizard page, add the
Customer_Number,Name,Address,City,State, andZipfields by clicking on the Add button. Click Next.
-
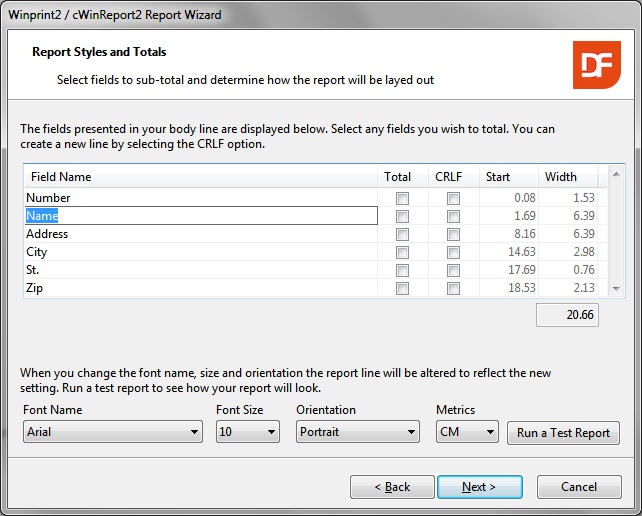
On the "Report Styles and Totals" wizard page, change the name of the
Customer Namefield toName.
-
You can now click the Run a Test Report button to preview what your report is going to look like. This is a great feature because it allows you to tweak your report layout very easily right here in the wizard before finalizing it.
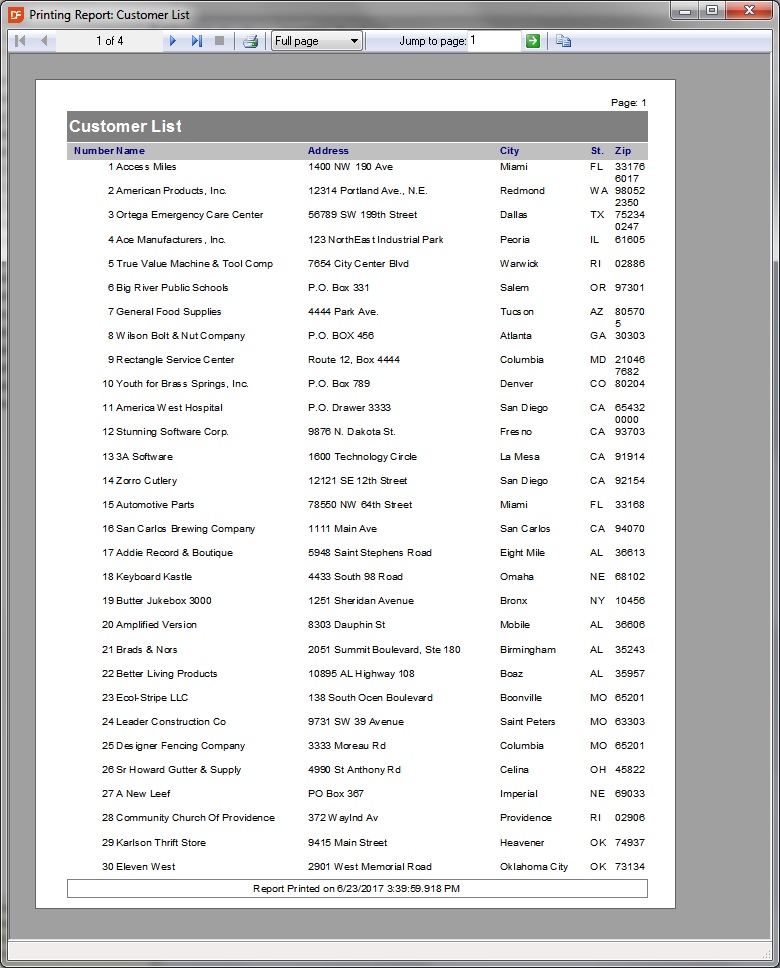
When you preview this report as it is now, you can see that Customer records with zip codes that have more than 5 digits wrap to the next line in the report.
Click the X button in the upper right-hand corner of the preview to close the WinPrint report viewer. -
Back on the "Report Styles and Totals" wizard page, adjust the Font Size from
10to8and test run the report again.
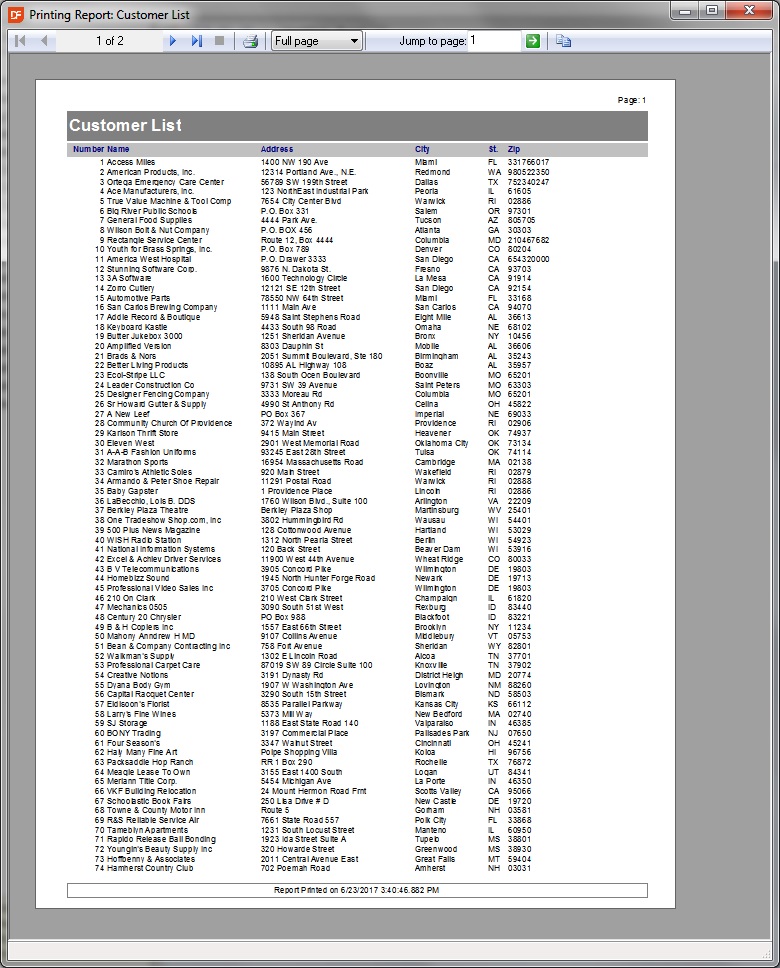
The report now fits much more nicely onto the page.
Click the X button in the upper right-hand corner of the preview to close the WinPrint report viewer. -
Back on the "Report Styles and Totals" wizard page, click Next.
-
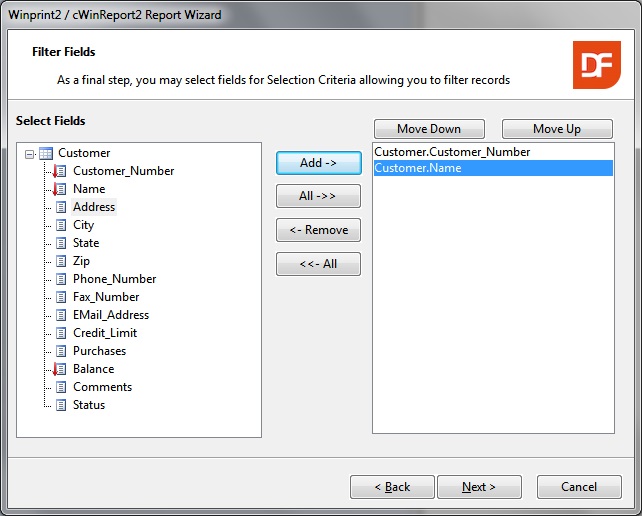
On the "Filter Fields" wizard page, add the
Customer_NumberandNamefields by clicking on the Add button.
Note that Indexed Fields have an icon with a red arrow to easily differentiate them from non-indexed fields.
Click Next.
-
Click Finish on the last wizard page.
You should now be back in the Studio, with the outline of the newly created report view in the Studio's visual designer.
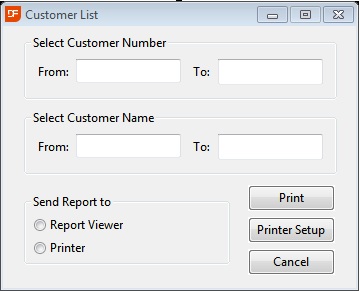
Report View
A Report View is a view from which a report is launched. Report Views often contain additional controls besides the Print button that prints the report.
For example, your Report View that was created with the "WinPrint 2 Report Wizard" has radios that allow the user to choose whether to run the report to the WinPrint Report Viewer or directly to the printer, a Printer Setup button from which printer options can be viewed and changed, and a cancel button to close the Report View. Last, but not least, there are forms for your "Filter Fields".
Note: You can place reports in Report Views or you can use the Report View wizard to develop reports and then integrate the reports into data entry views. The Adding Print Support to the Order View topic shows you how to do this.
Filter Fields
Filter Fields are also known as "selection criteria" or constraints. These fields allow the report's user to filter the results of the report. For example, the user can enter From 1 To 5 into the filter fields forms in the "Select Customer Number" group to only see those Customer records where Customer.Customer_Number falls into that range.
- In Workspace Explorer, you should see a Windows application (most likely
MyFirstWindowsApplication.src) as the Current Project. Click on the + in the tree view to expandMyFirstWindowsApplication.src, then click on the + to expand Reports. You can see thatCustomerList.rvhas been added to projectMyFirstWindowsApplication.src.
At this stage, you have created a fully functioning WinPrint report. The Studio has saved a report view as CustomerList.rv.
- So, let's test the completed report view.
Click on the Run button on the Studio's toolbar. The Studio will compile, then run your project. When the application runs, click on the Report menu and then Customer List to open the report view. Launch the report by clicking on the Print button.