Creating Data Dictionaries
This section will show you how to create multiple Data Dictionaries for the Contacts table. It will teach you:
- How to create new Data Dictionaries
- How to specify a Data Dictionary as the Default Data Dictionary for a given table
- How to deal with multiple Data Dictionaries for a single table
- How to test components using a Test Project
DataFlex is an object-oriented language. When you create a Data Dictionary, it creates a Data Dictionary class from that definition. When you create a component (e.g., a view or report) in the Studio that uses a database table, the Studio creates a Data Dictionary Object (DDO) in that component based on a Data Dictionary class.
For example, when you created the Contacts table, the Studio automatically created a Data Dictionary class for the Contacts table named cContactsDataDictionary. The Studio will create a Data Dictionary object (DDO) based on this class when you create a component (e.g., view or report) that uses this Data Dictionary class for the Contacts table.
You can create multiple Data Dictionary classes with varying business rules for any given table, or even multiple levels of classes that inherit from the top class down.
The DataDictionary class in the DataFlex class library is a generic class that contains methods and properties that apply to all Data Dictionaries. You can create a generic subclass of DataDictionary that is also "generic".
Most of the time, however, you'll be dealing with Table-Based Data Dictionaries. These are Data Dictionaries that have their Main_File property set to a specific table and contain business rules for that table.
See the Data Dictionary Guide for more information about business rules and Data Dictionaries. The Creating Business Rules section in the Creating a Complete Order Entry System tutorial will walk you through the details of designing and implementing business rules for an order entry application.
You are now going to create a subclass of the Data Dictionary class for the Contacts table you created and customized in the two preceding sections.
Create a Data Dictionary Subclass
- Open the QuickStart workspace in DataFlex Studio.
- Take a look at the Table Explorer window. If Table Explorer is not open, click on the Table Explorer button on the Studio's toolbar.
- In Table Explorer, expand the Contacts table (created in the Creating Tables step) to display its Columns, Indexes, Relationships, and Data Dictionaries. You will see
cContactsDataDictionarylisted, which is the Data Dictionary class that was created automatically when you created the Contacts table in the previous step.
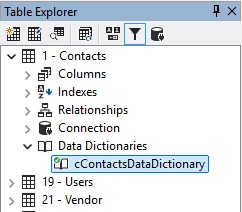
Note the check mark in the Data Dictionary icon. The fact that the Data Dictionary icon contains a check mark means that this Data Dictionary is the Default Data Dictionary for this table.
Any table listed in Table Explorer can have any number of Data Dictionaries created for that table. However, the Studio's modelers and wizards will always use the Default Data Dictionary for any table when creating new components such as views.
Create a View Based on cContactsDataDictionary
For example, go ahead and create a new View.
- Click on the Create New button on the Studio’s toolbar. Click on the View / Report tab of the Create New... dialog. Double-click the Data Entry View Wizard icon.
- Click Next on the first wizard page.
- On the Names wizard page, enter
oContactsViewDD1as the object name. Press Tab to have the filename and description values defaulted (leave the default values) and click Next. - On the "Entry View Style" wizard page, select Create a Simple Form Entry View, then click Next.
- On the "Main Data Dictionary" wizard page, click on Contacts - cContactsDataDictionary to select it as the data dictionary to be used, then click Next.
Note that this is the Default Data Dictionary for the Contacts table (of course, currently, this is also the only Data Dictionary for the Contacts table).
- On the "Entry Fields" wizard page, add
ContactsId,First_Name,Last_Name,City,State, andZipcolumns using the Add button. Click Next. - On the "Labels, Alignment and Preview" wizard page, click Next.
- Click Finish on the last wizard page.
You should now be back in the Studio, with the newly created ContactsViewDD1.vw view open in the visual designer and code editor.
Create a Test Project
Next, create a Test Project to test this view in.
Test projects are projects specifically created for testing components on a small scale. For example, when creating a new view, you may want to test that view by itself before including it in a huge complex application. You can create as many test projects as you like, but each workspace can only have one project currently defined as the test project for that workspace.
See View/Report Test Project for more information about test projects.
- Click on the Create New button on the Studio’s toolbar. Click on the Project tab of the Create New... dialog. Double-click the Test Windows Project icon.
- Enter
TestProjectas the File Name and click Ok. This will create a test project namedTestProject.src.
In the Studio, you will notice that the test project you just created is open in the visual designer and code editor. Also, notice that the new test project has been made the current Studio project.
- Right-click in Workspace Explorer.
You will see that the context menu item Deselect as Test View Project is checked. This indicates that the newly created test project is currently defined as the test project for this workspace.
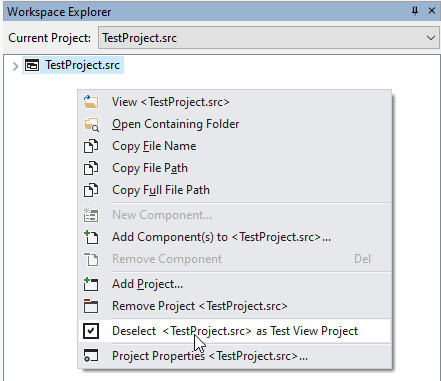
- Close
TestProject.srcin the visual designer and code explorer. You don't need to work with the visual layout or code for the test project anymore; the Studio will handle testing for you.
Now you are ready to test the view you created earlier.
- Right-click in the visual designer or code editor for
ContactsViewDD1.vwand select Test View/Report in Project from the context menu.
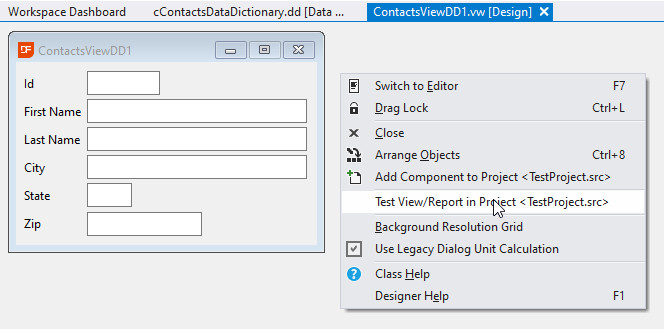
The Studio will add your view to the test project and compile and run the project. You can now test your view in an isolated manner.
Create a Second Data Dictionary for the Contacts Table
Now you can create a second Data Dictionary for the Contacts table.
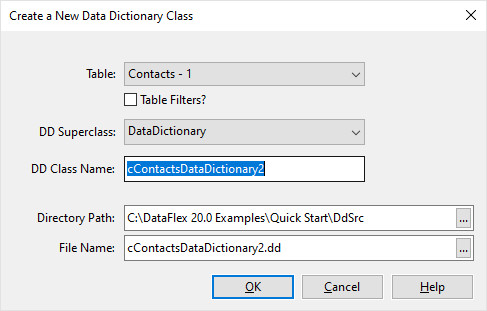
- Select Create New Data Dictionary... from the Table Explorer context menu. If you have the Contacts table selected while doing so, the Create New Data Dictionary Class dialog will open with the proper table preselected.
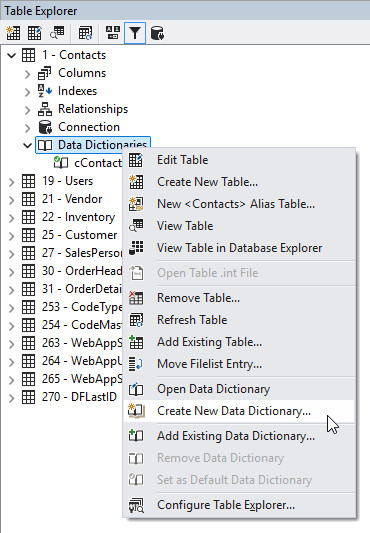
- The Create New Data Dictionary Class dialog will open. If the Contacts table is not selected, select it now from the Table combo box.
Select cContactsDataDictionary as the DD Superclass.
The list of DD superclasses could contain any number of custom Data Dictionary subclasses you wish to use for your projects. For example, you could use a Data Dictionary subclass from that library workspace that contains business logic to be inherited by all Data Dictionaries across all your company's workspaces and projects.
When you press Tab to navigate into the DD Class Name form, the name cContactsDataDictionary2 and the File Name cContactsDataDictionary2.dd will be defaulted for you. Accept these defaults and click Ok.
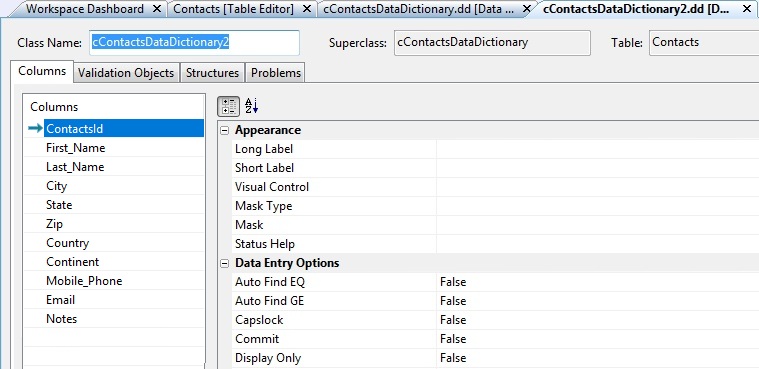
- The new Data Dictionary class will now open in the Studio's Data Dictionary Designer.
- Take a look at the Table Explorer window again. Expand the Contacts table and then its Data Dictionaries node.
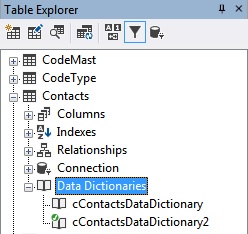
You now see that cContactsDataDictionary2 is listed here below cContactsDataDictionary and the newly created cContactsDataDictionary2 is now marked as the Default Data Dictionary.
- If you examine the Column options and other settings in the Data Dictionary Designer, you will see that they are identical to those in
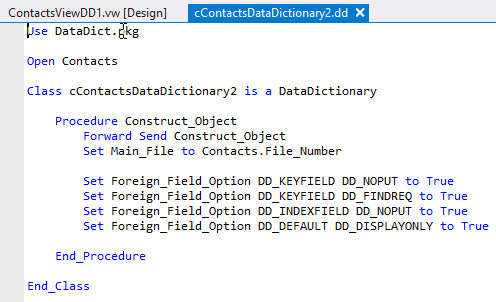
cContactsDataDictionary. This is how it should be, since, at the moment, thecContactsDataDictionary2class is a subclass ofcContactsDataDictionarywith no code of its own.
If you press F7 to view the source code for cContactsDataDictionary2, you will see that it is very simple:
- Press F7 again to switch back to the Data Dictionary Designer view for
cContactsDataDictionary2. In the Columns tab page, select theStatecolumn and set the Default Value option in the Other group toFL.
This is going to be the only change in business rules between the two Data Dictionaries for the Contacts table for this tutorial.
Save the cContactsDataDictionary2.dd file.
Create a View Based on cContactsDataDictionary2
Now, go ahead and create a second View.
- Click on the Create New button on the Studio’s toolbar. Click on the View / Report tab of the Create New... dialog. Double-click the Data Entry View Wizard icon.
- Click Next on the first wizard page.
- On the Names wizard page, enter
oContactsViewDD2as the object name. Press Tab to have the filename and description values defaulted (leave the default values) and click Next. - On the "Entry View Style" wizard page, select Create a Simple Form Entry View, then click Next.
- On the "Main Data Dictionary" wizard page, click on Contacts - cContactsDataDictionary2 to select it as the data dictionary to be used, then click Next.
Note that this time around, the only Data Dictionary you can choose for the Contacts table is cContactsDataDictionary2. This is because cContactsDataDictionary2 is now the Default Data Dictionary for the Contacts table.
- On the "Entry Fields" wizard page, add
ContactsId,First_Name,Last_Name,City,State, andZipcolumns using the Add button. Click Next. - On the "Labels, Alignment and Preview" wizard page, click Next.
- Click Finish on the last wizard page.
You should now be back in the Studio, with the newly created ContactsViewDD2.vw view open in the visual designer and code editor.
Now you are ready to test the new view you just created.
- Right-click in the visual designer or code editor for
ContactsViewDD2.vwand select Test View/Report in Project from the context menu.
The Studio will add your view to the test project and compile and run the project.
When the test project runs, you will see the second contacts view you've created open and that FL is defaulted in the State form. This is because this view uses cContactsDataDictionary2, which has the Default Value = FL business rule you defined.
This concludes your introduction to creating and working with Data Dictionaries in the Studio.
Next Step
Next, you will learn how to create Windows components: Creating Windows Components