Creating Tables
This section will show you how to create an embedded database table. You will create a simple Contacts table for maintaining personal contacts.
DataFlex Databases
A database in DataFlex is basically a collection of tables (in any supported database format) and a file named filelist.cfg (typically just called the filelist) that combines the tables into a collection. The filelist assigns a number and name to each table, in addition to a reference to the physical table name. Each DataFlex application requires a filelist to access database tables. When you create a DataFlex workspace, the workspace is created with a Data folder that already contains a filelist, as well as two support tables (CodeMast and CodeType).
Creating a table means creating a table in the chosen database and creating an entry for it in the filelist.
The Table Explorer is the main access point in the Studio for database tables and Data Dictionaries.
Table Explorer
The Table Explorer is a docking window that lists the current project and components included in the current project by type. By default, this panel is located on the left side of the Studio, as a tab in the same window group as Code Explorer.
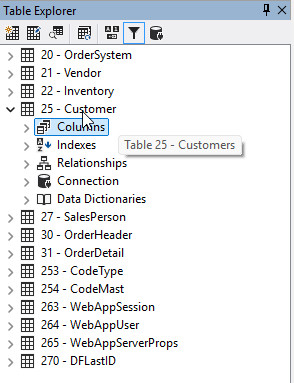
Most actions you will perform are available on the Table Explorer's context menu. Additional actions for database-related work are available from the Table Explorer's toolbar and the Database menu on the main Studio menu bar.
Table Explorer offers a tremendous wealth of information about the database in a workspace. Take some time to examine Table Explorer a little:
- If you expand any table, you will see the columns, indexes, relationships, and Data Dictionaries for that table.
- Expanding the Columns node for any table lists the columns for that table.
- Expanding the Indexes node for any table lists the indexes for that table, and expanding any index node lists the segments for that index.
- Expanding the Relationships node for any table lists the relationships for that table, and expanding any relationship node lists the column pairs making up the relationship.
- Hovering over many tree nodes will give you useful information about that node in a tooltip:
- If you hover over a table, a tooltip shows you the table's name and filelist number.
- If you hover over a column, a tooltip shows you the column's number, data type, and length.
You can learn more about Table Explorer in the Table Explorer topic in the Studio book.
Steps to Create a Table
-
Open the QuickStart workspace in DataFlex Studio.
-
Take a look at the Table Explorer window. If Table Explorer is not open, click on the Table Explorer button on the Studio's toolbar.
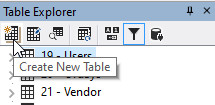
- Click the Create New Table button on the Table Explorer toolbar.
In the Create New Table dialog, click on the Embedded tab, type Contacts as the Table Name.
Notice that the Studio defaults to automatically creating a Primary Key and Auto Increment Table.
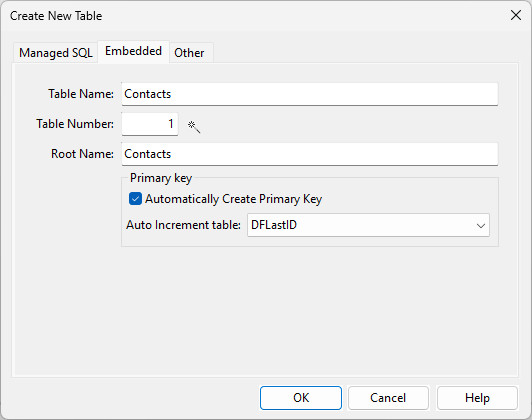
Auto-Incrementing in the Embedded Database
The embedded database does not have built-in auto-incrementing; instead, it uses a table (in this case, a system table) column to auto-increment from.
You will see how this is done on the page Customizing Data Dictionaries.
Click Ok:
The new table will open in the Table Editor:
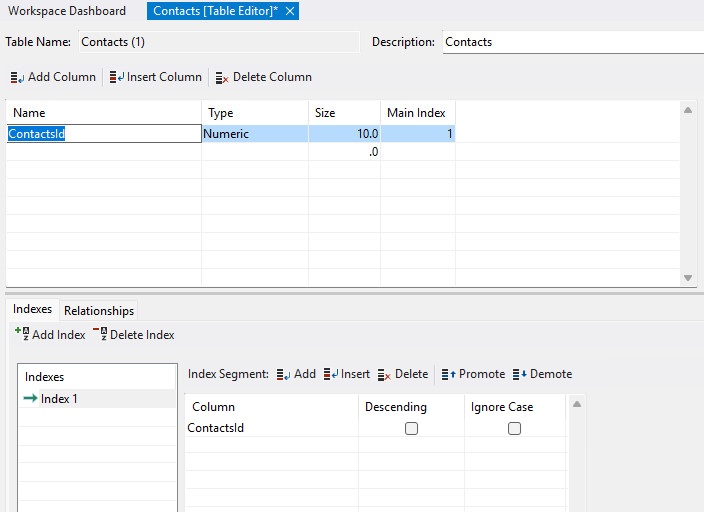
Table Editor
The Table Editor is a window that allows editing of database table schemas. Please read more about the Table Editor in the Table Editor topic in the Studio book.
Notice that the ContactsId column was automatically generated because you left the Automatically Create Primary Key checkbox checked.
If you look at the Indexes tab below, you will see that Index 1 was also automatically created and its only segment is the Primary Key column ContactsId.
Steps to Add Columns and Indexes
- Click on the Add Column toolbar button in Table Editor to add a new column.

-
Type
First Nameas the Name of the first column to add and press the Tab key to move to the Type column. ChooseASCIIas the column type from the combo box (you can just typeAto do so) and press Tab; make the length20.0and press Tab twice to move to the next row. This completes the definition of this column. -
Type
Last Nameas the Name of the second column; chooseASCIIas the column type and make the length20.0. -
Continue to add columns to the table until your column definitions look like those in the image below.
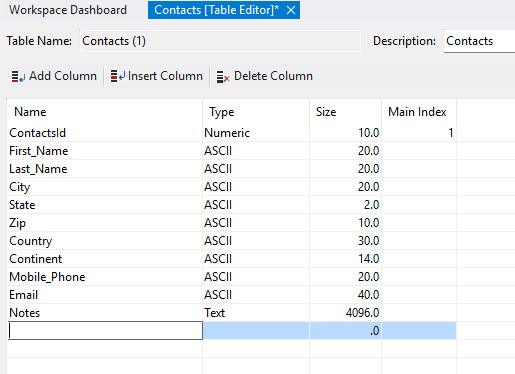
Note: For this tutorial, we are using a very simple table, so we are not normalizing data. In a real-world application, Continent would be an attribute of a Country table and Country would be a parent of the Contact table.
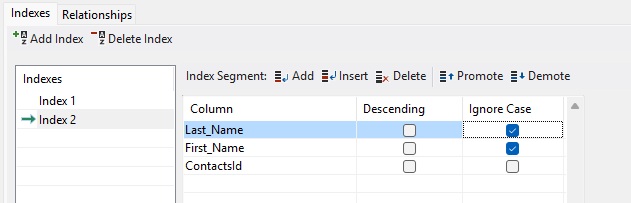
- Click on the Add Index toolbar button on the Indexes tab to add a new index. This will add Index 2.

- Enter the Segments grid and select
First_Nameas the column to add as the first index segment from the combo box. Then add segmentsLast_NameandContactsId.
Check the Ignore Case checkboxes for the First_Name and Last_Name index segments. This will ensure that the names of your contacts are sorted correctly regardless of the casing when you add them to the database.
Adding the ContactsId column to this index allows you to add multiple contacts with the same first and last name.
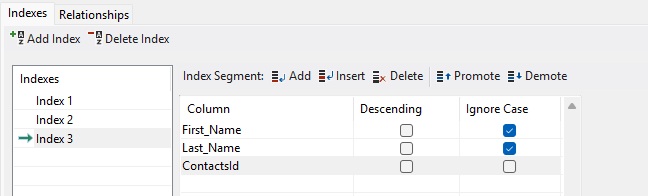
- Click on the Add Index toolbar button to add a third index. The segments of this index will be
Last_Name,First_Name, andContactsId. Again, check the Ignore Case checkboxes for theLast_NameandFirst_Nameindex segments.
The index tab with all 3 indexes added should look like this:
- Click the Save File toolbar button (or press Ctrl + S) to save the table schema.
The Output window will display the results of the save operation.