Customizing Data Dictionaries
This section will show you how to customize the Data Dictionary for the Contacts table that was created automatically when you created the Contacts table in the previous step.
To learn how to create a new Data Dictionary, see Creating Data Dictionaries.
We will only scratch the surface of the power of Data Dictionaries here, but you will learn about the main concepts of Data Dictionaries and how to add simple business rules to Data Dictionaries.
See the Customizing the Data Dictionaries sub-book of the Creating a Complete Order Entry System book to work through much more in-depth details of many of the options available in the Data Dictionary Modeler.
Also, remember that you can press F1 just about anywhere in the Studio to see help for that particular Studio part, or in many cases, that particular topic in DataFlex. For example, pressing F1 in any Column option in the Data Dictionary Modeler will take you to a page explaining that option.
Data Dictionary Classes and Objects
DataFlex is an object-oriented language. When you create a Data Dictionary for a particular table, it creates a DataDictionary class from that definition. When you create a component (e.g., a view or report) in the Studio that uses a table, the Studio creates a Data Dictionary Object (DDO) in that component based on a DataDictionary class.
For example, when you created the Contacts table, the Studio automatically created a Data Dictionary class for the Contacts table named cContactsDataDictionary in a file named cContactsDataDictionary.dd. The Studio will create an object named oContacts_DD based on this class when you create a component that uses this DataDictionary class for the Contacts table.
You can create multiple DataDictionary classes with varying business rules for any given table, or even multiple layers of classes that inherit from the top class down, but this sample will focus on a single DataDictionary class for the Contacts table.
The Table Explorer is the main access point in the Studio for database tables and Data Dictionaries.
Table Explorer
The Table Explorer is a docking window that lists the current project and components included in the current project by type. Please read more about this in the Table Explorer topic in the Studio book. By default, this panel is located on the left side of the Studio, as a tab in the same window group as Code Explorer.
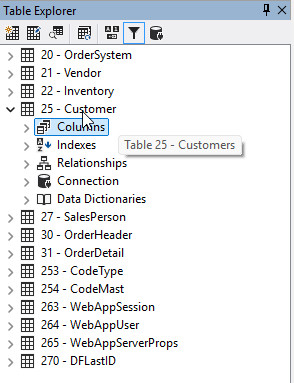
Most actions you will perform are available on the Table Explorer's context menu. Additional actions for database-related work are available from the Table Explorer's toolbar and the Database menu on the main Studio menu bar.
Table Explorer offers a tremendous wealth of information about the database in a workspace. Take some time to examine Table Explorer a little:
- If you expand any table, you will see the columns, indexes, relationships, and Data Dictionaries for that table.
- Expanding the Columns node for any table lists the columns for that table.
- Expanding the Indexes node for any table lists the indexes for that table, and expanding any index node lists the segments for that index.
- Expanding the Relationships node for any table lists the relationships for that table, and expanding any relationship node lists the column pairs making up the relationship.
- Hovering over many tree nodes will give you useful information about that node in a tooltip:
- If you cursor over a table, a tooltip shows you the table's name and filelist number.
- If you cursor over a column, a tooltip shows you the column's number, data type, and length.
You can learn more about Table Explorer in the Table Explorer topic in the Studio book.
- Open the Quick Start workspace in DataFlex Studio.
- Take a look at the Table Explorer window. If Table Explorer is not open, click on the Table Explorer button on the Studio's toolbar. Expand the Contacts table to display its Columns, Indexes, Relationships, and Data Dictionaries. Expand the Data Dictionaries node.
- Right-click on Data Dictionaries and select Add Existing Data Dictionary...
- Select
cContactsDataDictionary.ddin the Select Data Dictionary Class for table (Contacts), which is the Data Dictionary class file that was created automatically when you created the Contacts table in the previous step.
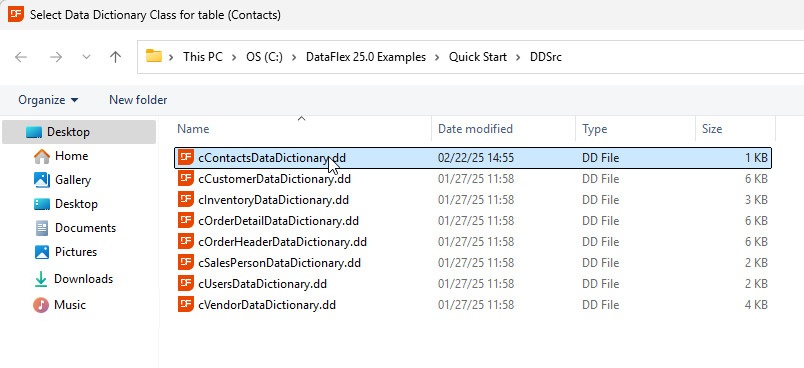
Note the check mark in the Data Dictionary icon. The fact that this icon contains a check mark means that this is the Default Data Dictionary for this table.
If you do not have a Contacts table listed, the Creating Tables topic walks you through creating it.
Default Data Dictionary
Any table listed in Table Explorer can have any number of Data Dictionaries created for that table. However, the Studio's modelers and wizards will always use the Default Data Dictionary for any table when creating new components such as views.
You will go into more details about Default Data Dictionaries in the next section, Creating Data Dictionaries.
- Double-click on the
cContactsDataDictionaryclass. The class will now open in the Studio's Data Dictionary Modeler.
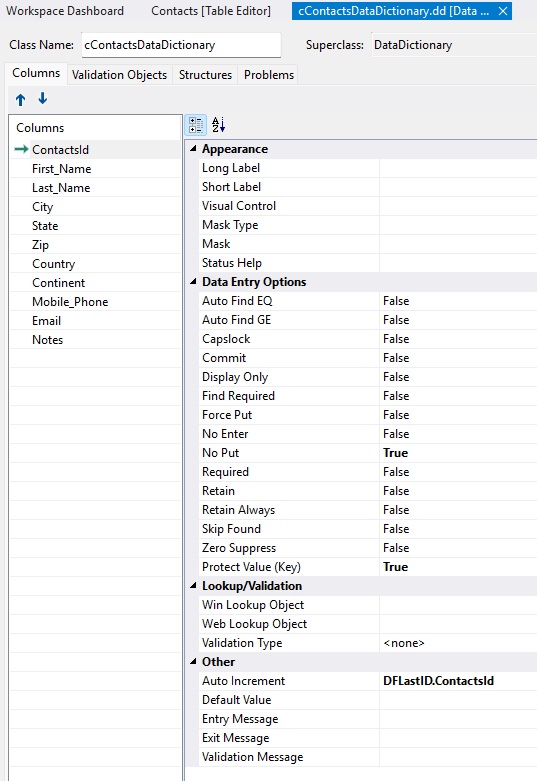
As with visually modeled source code files such as views and report views, an additional window showing the source code for this Data Dictionary class has opened, in addition to the Modeler.
Tip: You can press F7 to toggle between the two different views (code editor and designer) of the current file. If only one of the views is open when you press F7, the other view will automatically be opened and added as a new tab page.
- On the Data Dictionary Modeler's Columns tab page, select the State column and set the Capslock option in the Data Entry Options group to True.
You can do this by opening the combo form's list and choosing True, or by simply double-clicking on the Capslock option. Double-clicking here toggles between the available options.
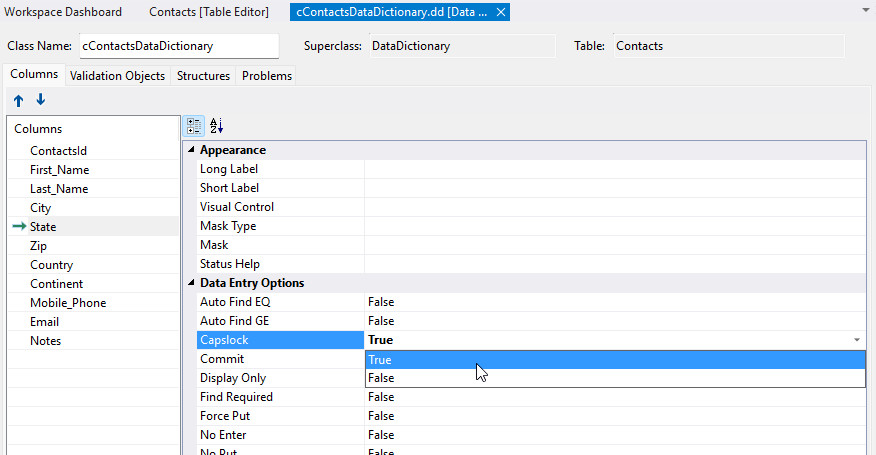
This is one of the simplest rules you can define in a Data Dictionary. This will force data entered into the Contacts.State column to always be capitalized.
- Select the Zip column and set the Mask option in the Appearance group to
#####-####.
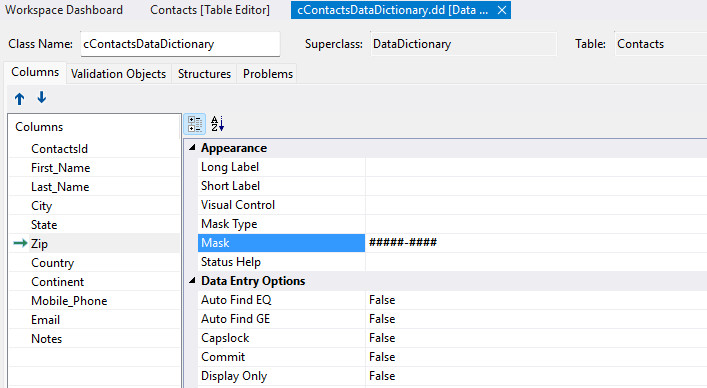
This custom mask will force data to be entered into the Contacts.Zip column to be of the specified format, #####-####. The # signifies that only a numeric character (0-9) can be entered. So, the mask allows 5 numeric characters, followed by a dash (or minus sign) and then 4 numeric characters, which is the U.S. zip code format.
Next, you are going to add a validation table for the Continents column.
Validation Tables
Defining a validation table for the Continent column will cause the column to be associated with this validation table wherever it is used. In a Windows application, Contacts.Continent will appear as a combobox with the list of continents in the drop-down list.
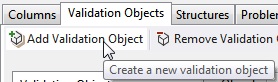
- Click on the Validation Object tab in the Data Dictionary Modeler. Then click on the Add Validation Object toolbar button.
- This opens the Create New Validation Object dialog.
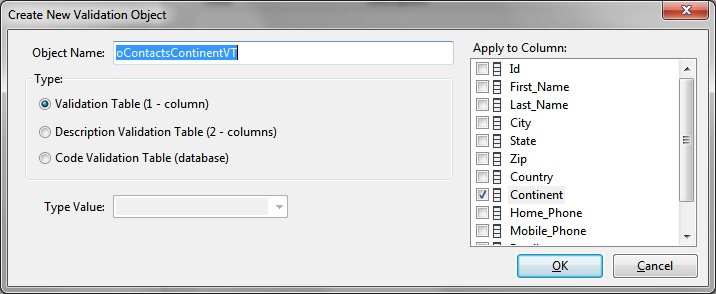
Type oContactsContinentVT as the Object Name. Leave the default Type of Validation Table (1 - column). Make sure the Continent column is checked in the Apply to Column list. Click Ok.
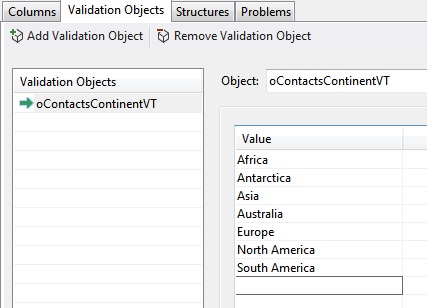
- Click in the grid and start typing the list of valid continents, one per row: Africa, Antarctica, Asia, Europe, North America, South America. The completed list should look like this:
-
Click on the Columns tab again. Select the Continent column. You can now see that the Validation Type option in the Lookup/Validation Table group is filled in with
oContactsContinentVT. This value was filled in when you created the validation object and applied it to the Continents column. -
If the Code Explorer window is not open, click on the Code Explorer toolbar button.

Notice that the oContactsContinentVT object has been added to the Data Dictionary file (cContactsDataDictionary.dd) and is now listed in Code Explorer. Select oContactsContinentVT in Code Explorer.
- Click on the Properties toolbar button to open the Properties window.

In the Properties window, you can now see and change the properties for the newly created validation table object.
Of course, you can also select any other node in Code Explorer, such as the cContactsDataDictionary class and see its properties in the Properties window.
- Select the Continent column, select the Default Value option in the Other group. Type North America as the Default Value.
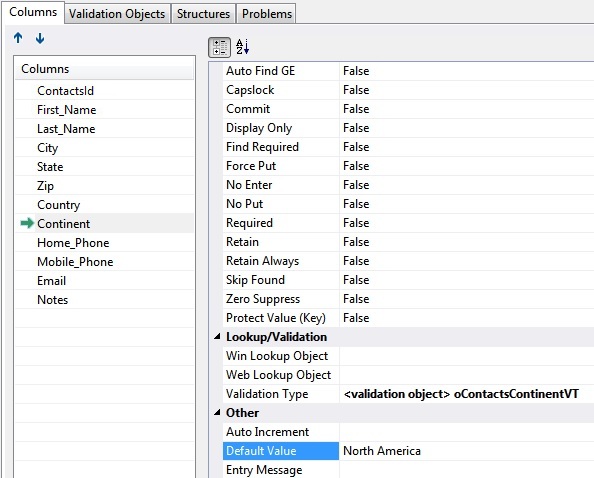
This will default the value of the Continent column to "North America" when a view or web form is cleared to start a new record.
- Open the
DFLastIDtable by double-clicking on it in Table Explorer.
The table will open in the Table Editor.
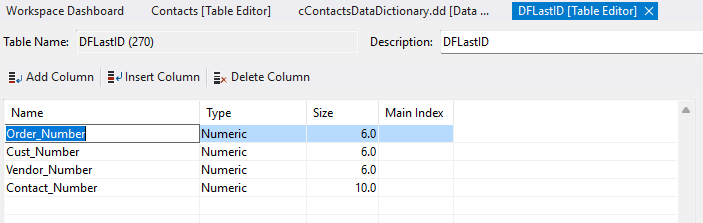
The embedded database does not have built-in auto-incrementing; instead, it uses a table (in this case a system table) column to auto-increment from.
A system table is a table that contains only one record and also has its DF_File_Max_Records attribute set to 1. DataFlex will automatically find and load this single record upon opening a system table.
In Creating Tables, you left the Automatically Create Primary Key checkbox checked when creating the Contacts table. The Studio automatically added a new column named Contact_Number to the DFLastId system table.
- Select the tab in the main Studio window with
cContactsDataDictionary.ddopen in the Data Dictionary Modeler. Select the Auto Increment option in the Other group.
Click on the Prompt (...) button in the Auto Increment option form.
This will open the Select Auto Increment Table and Column dialog.
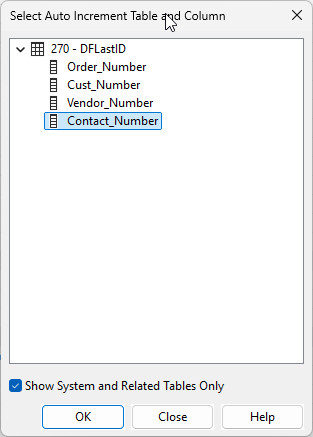
Expand the DFLastID table and select the Contact_Number column, then click Ok.
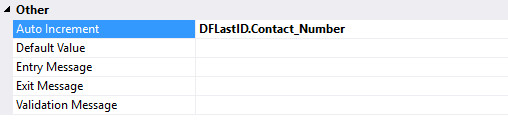
Now that the Auto Increment option form is filled in with the system table and column (DFLastID.Contact_Number) to increment from, the Data Dictionary will perform the auto numbering of Contacts.ContactsId automatically when a new Contacts record is saved.
- Save the
cContactsDataDictionary.ddfile.
Next Step
Next, you will learn how to create a new Data Dictionary in Creating Data Dictionaries.