Creating a Data Entry View
Let's create a Customer data entry view in the Studio, using the "Data Entry View Wizard".
Data Entry View
A data entry view is a component that contains data entry objects (DEOs), such as dbForm and dbGrid objects designed for creating new records and editing existing records.
Tip
Ensure that the Current Project in Workspace Explorer is a Windows Application, not a web application. If you try to create a Windows project component, such as a view, and the current project is a web application, the Studio will display an error message and not allow you to create the component.
Steps to Create a Data Entry View
- Click on the Create New button on the Studio’s toolbar.
- Click on the View / Report tab of the Create New... dialog.
-
Double-click the Data Entry View Wizard icon.
-
Read the explanations on the first wizard page of what this wizard will do and click Next.
-
On the Names wizard page, enter
CustomerEntryas the object name,CustomerEntryas the filename, andCustomer Entryas the description, then click Next.
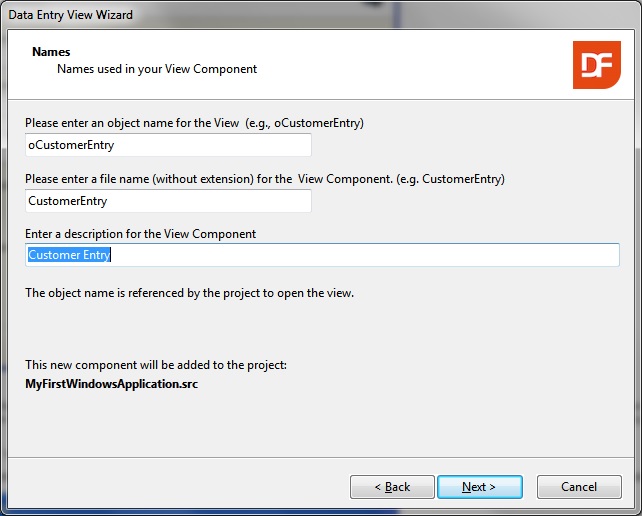
Naming Views
Views are containers for the forms and other controls which go to make up data-entry screens. Most programs are made up of one or more views, each containing several controls. For example, the dialogs in the wizard you are using to create your application have title bars with appropriate names, bitmaps for illustration, text boxes for instructions, forms for the entry of specific information, and buttons for navigation.
-
On the "Entry View Style" wizard page, select Create a Simple Form Entry View, then click Next.
-
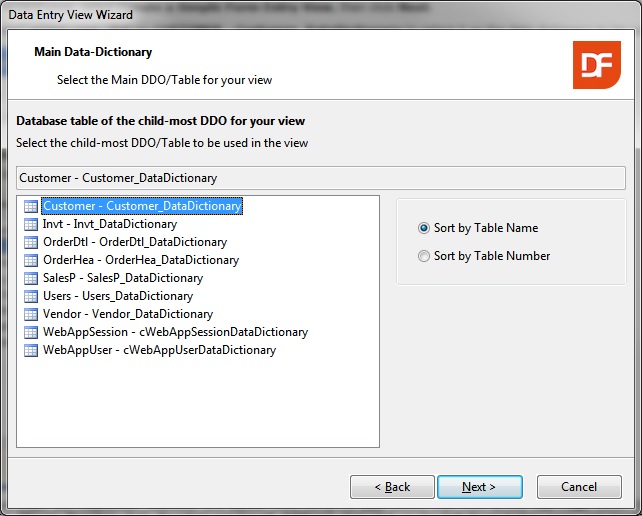
On the "Main Data Dictionary" wizard page, click on CUSTOMER - Customer_DataDictionary to select it as the data dictionary to be used, then click Next.
-
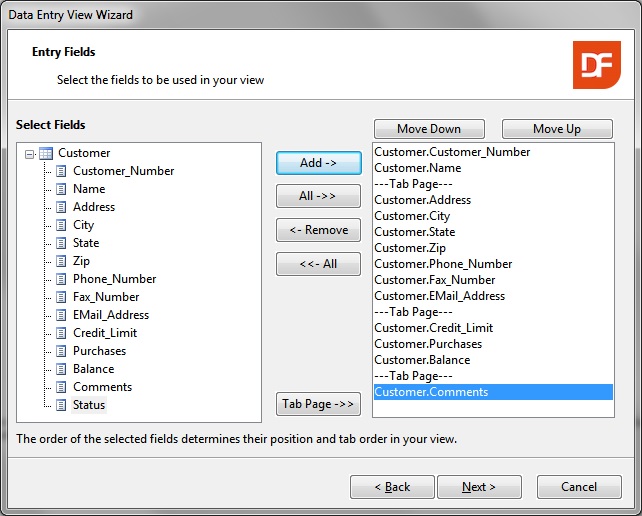
On the "Entry Fields" wizard page, add
Customer_NumberandNamefields using the Add button, then click on the Tab Page button (this will place the fields following the --Tab Page-- divider on another tab page in the view). AddAddress,City,State,Zip,Phone_Number,Fax_Number, andEmail_Address, then click on the Tab Page button again. AddCredit_Limit,Purchases, andBalance. Click on the Tab Page button once more and addComments. Click Next.
-
On the "Labels, Alignment and Preview" wizard page, check the checkboxes in the Same Line column for
Customer.StateandCustomer.Zip. This will keep fields City, State, and Zip on the same line (vertical location) in the view. Replace the 3 blue Tab Page Label labels withAddress,Balances, andComments, in order from top to bottom.
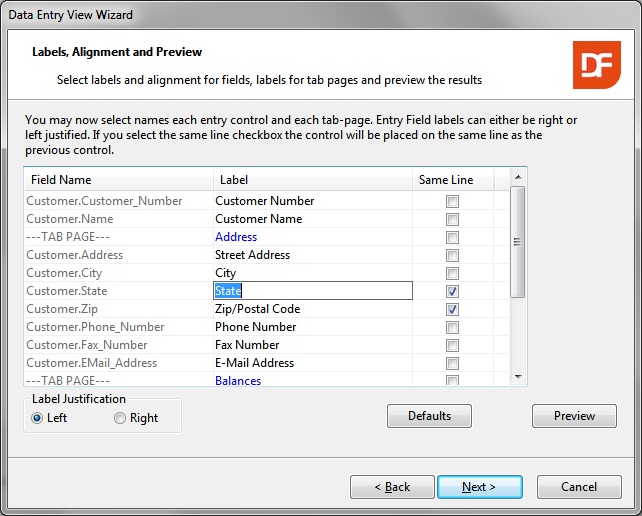
The field labels are defaulted from the data dictionary, but you can customize them here for your view.
-
You can now click the Preview button to preview what your view is going to look like. This is a great feature because it allows you to tweak your view layout very easily right here in the wizard before finalizing it.
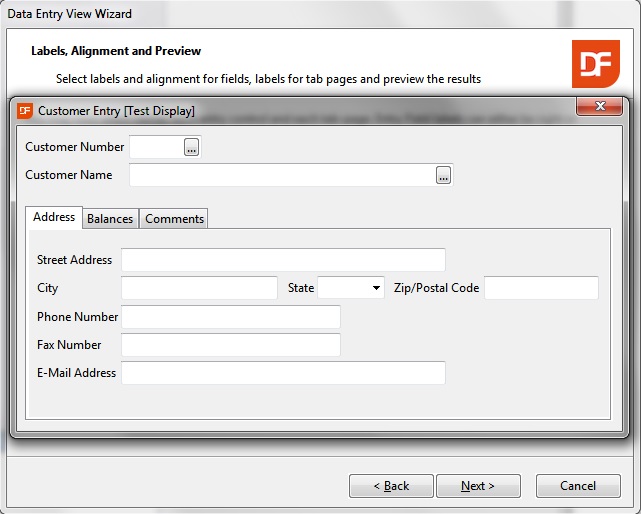
Notice that many properties defined in the data dictionary are already displayed in this preview:
- The "Customer Number" and "Customer Name" forms have prompt buttons in the form (the buttons with the 3 dots), which indicates that they have a lookup list associated with the database field.
- The State field is represented by a combo form.
- All form sizes are approximated depending on their field lengths and types.
Click the X button in the upper right-hand corner of the preview to close it.
-
Try previewing the view with both left and right label justifications to see which you prefer.
Once you are satisfied with the layout of your view, click the Next wizard button.
-
Click Finish on the last wizard page.
You should now be back in the Studio, with the outline of the newly created view in the Studio's visual designer.
-
In Workspace Explorer, you should see a Windows application (most likely
MyFirstWindowsApplication.src) as the Current Project. Click on the + in the tree view to expandMyFirstWindowsApplication.src, then click on the + to expand Views. You can see thatCustomerEntry.vwhas been added to projectMyFirstWindowsApplication.src.
At this stage, you have created a fully functioning data entry view. The Studio has saved your view as CustomerEntry.vw.
- At this point, you cannot successfully compile the view because the Data Dictionary contains a reference to a Customer lookup list. You will create this in the next step, Creating a Lookup List.