Creating Your First Web View
We are going to illustrate some basic DataFlex Web application development techniques using a variation of the well-known "Hello, World" program, which is used as the first program to teach many programming languages.
The web view you will create will be very simple, with a form and a button. The user will type his or her name into the form and click the button. The name will then be added to "Hello, ", resulting in "Hello, John" for example. This result will be displayed in a message box.
Web View
Web Views (cWebView class) are the main visual containers for web applications in DataFlex. Read more about them in the cWebView class documentation.
-
Click on the Create New button on the Studio’s toolbar. Click on the Web Object tab of the Create New... dialog. Double click the Web View icon.
-
The "Create a New Web View" dialog will open. Enter HelloWorld as the object name. Notice that the filename automatically changes to HelloWorld.wo as you type the object name. Accept the default directory path (the AppSrc folder in the QuickStart workspace). Click on the Ok button.
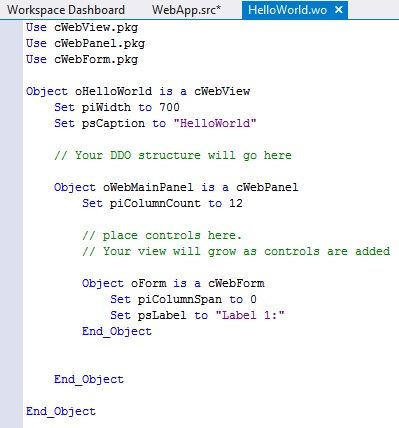
You will now see the source code of the new web view in the Studio.
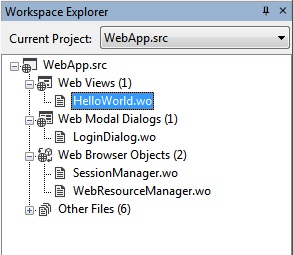
- In Workspace Explorer, you should see WebApp.src as the Current Project. Click on the + in the tree view to expand WebApp.src, then click on the + to expand Web Views. You can see that HelloWorld.wo has been added to project WebApp.src.
If you click on the + to expand Web Modal Dialogs, Web Browser Objects, and Other Files, you will see all other files that are currently part of the project.
- You can now open the WebApp Designer, either from the View menu, then WebApp Designer, or by pressing F7.
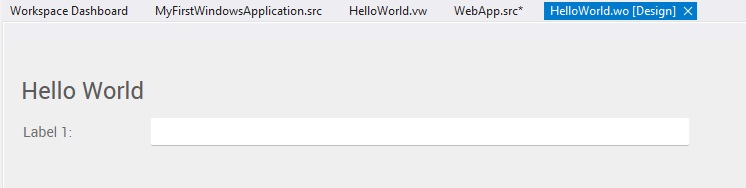
Tip: You can press F7 to toggle between the two different views (code editor and WebApp Designer) of the current file.
As you edit the source code of your web view, web dialog, or WebApp.src, the Designer will dynamically update to reflect your changes. Editing object properties in the Properties Panel are also reflected in the Designer.
Read more about the WebApp Designer here.
- The web view, by default, already has a form (class cWebForm) object on it, so you still have to add a button to complete the design.
Click on the Class Palette button on the Studio's toolbar.
This will bring up the Studio's Class Palette. Click the + on the Web Controls group to expand it if it isn't expanded already. This will show you all available web controls.
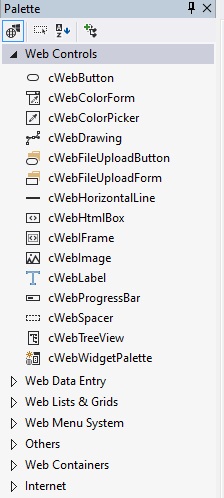
Class Palette
The Class Palette is a docking window that lists the controls available for use in the Studio for the current workspace. It is separated into different groups of controls based on the use and functionality of the controls in each group.
Since you are currently working on a web project, by default the Class Palette only shows controls usable in web applications.
The Class Palette is fully customizable. Please read more about this in the Class Palette topic in the Studio book.
- Drag and drop a cWebButton control from the Web Controls group on the Class Palette onto the WebApp Designer, below the existing form object.
In order to get the button to be below the existing form object, drag it past the form object to the point that you see a vertical bar that is a placeholder for where the new object will be placed.

Tip: It can be a bit tricky to get the placement of controls just right when dragging and dropping them into the WebApp Designer. If the drag and drop goes wrong, you can always hit the undo button on the toolbar (or press Ctrl+Z) and try again. Be sure to drag the control and keep the right mouse button held down to see how the Designer's placeholders guide you. Let go of the mouse button only when you have the object just where you want it. You could also pick up the object again and move it to another location.
Tip: The WebApp Designer is one of the DataFlex Studio's many docking panes. You can arrange these any way you want. For the screenshot above, I made the WebApp Designer display as a floating pane. Read more about how to work with the Studio's docking panes.
- If you get this right, as the image below shows, the button will wrap to the next row on the panel and display below the form:

Tip: In the screenshot above, the button's blue border overlaps the other controls. This is another WebApp Designer visual aid to help you work with the currently selected control (the button). If you select another control, e.g., the parent view object, the blue border will disappear from the button and switch to the newly selected object.
-
Select the oForm object in WebApp Designer and, in the Properties window, change the Object name to oNameForm (the object name is at the top of the Properties window). Set the psLabel property to Name: and the psPlaceholder property to Type your name here.
-
Select the oWebButton1 object in the WebApp Designer, change the Object name to oGoButton and set the psCaption property to Go.
-
Select the oHelloWorld object in the WebApp Designer, change the psCaption property to Hello, World!.
-
Next, you will add some code to the existing Procedure OnClick in the oWebButton1 object.
-
The first line of code is:
String sName sResult
CodeSense
As you start typing code, you will sometimes notice a list pop up that presents you with possible options. In most cases, this semi-automatic list feature of CodeSense will know the right time to appear and present you with appropriate contextual choices. If you want to manually invoke this list, press Ctrl+Space on just about any line or word you are typing.
CodeSense is a set of Studio features that intelligently assist you in writing code, providing lists of context-sensitive options and information. Using CodeSense dramatically increases productivity, as it gives you context-sensitive information directly when you need it as you're typing code in the editor, so you don't have to leave the editor to look up references in the documentation. It can even be used to complete your typing for you, minimizing typos, etc.
You can learn more about using CodeSense here.
This line of code declares two local string variables with the names sName and sResult.
Variable Scope
The scope of a local variable is limited to the method (procedure or function) in which it is declared. You can "use" these variables, meaning that you can assign a value to them and access their existing value only while in the current method, in this case, Procedure OnClick. Attempting to reference variables outside of the scope in which they are declared will result in a compiler error.
Variable Names
Just as with object names, it is useful to give your variables meaningful names. The names x or y are not nearly as meaningful as sName. In a more complex method, with dozens of variables, having the ability to easily identify the meaning of a variable name will make you a more efficient programmer.
We recommend using the prefix s for string variables. Prefixes like this also help in identifying the meaning of variable names. If you stick with this naming convention, you will never confuse a variable that holds a string with one that holds a number. You can read more about DataFlex Naming Conventions in the Language Guide.
-
The next line of code is:
WebGet psValue of oNameForm to sName
This line of code retrieves the current value of the web property psValue of the oNameForm object to the local string variable sName.
-
The next line of code is:
Move ("Hello, " + sName) to sResult
This line of code concatenates the contents of the string variables "Hello, " and sName and moves that value to the string variable sResult. So, if for example, sName contains "John", this would move "Hello, John" to sResult.
-
The next line of code is:
Send ShowInfoBox sResult
This line of code calls a message box that displays the contents of the string variable sResult.
-
The completed code should look like this:
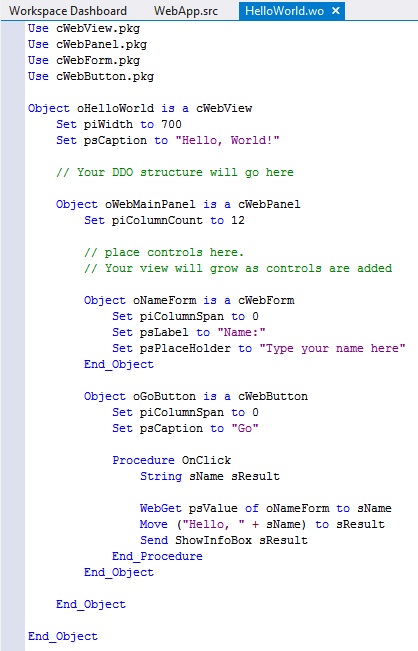
-
Now, let's test your completed Web View.
Click on the Run button on the Studio's toolbar. The Studio will compile, then run your project.
When the application runs, your browser should display the http://localhost/QuickStart/Index.html page.
Click on the Views menu and notice that HelloWorld is now listed here.
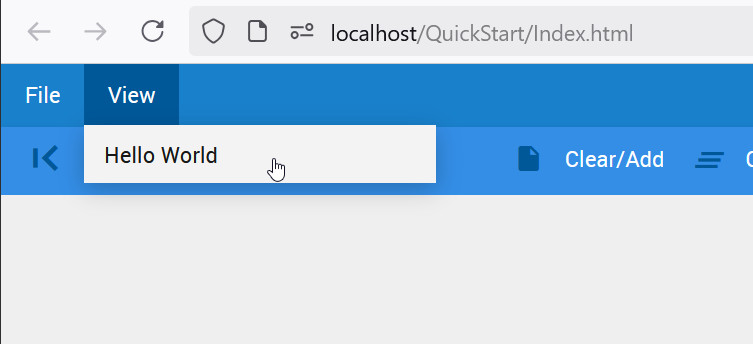
-
This is because the view name was inserted into the main application when the Web View template was executed and before you changed the view's psCaption to Hello, World. You can open WebApp.src, find the appropriate menu object (Object oHelloWorldMenuItem1 is a cWebMenuItemLoadView) and change its psCaption to Hello, World to correct this.
An alternate solution, since in this case we only have a single view in our program, plus since in a test program we probably don't care about the specific order of menu items, is to simply remove the web view from the program and then add it back. Doing so will take the current psCaption of the view and use it as the menu item's caption.
-
In Workspace Explorer, right-click on HelloWorld.wo and select Remove Component from the context menu.
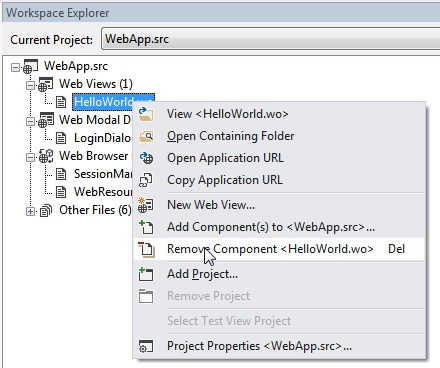
This removes the web view from the project. Now let's add it back:
-
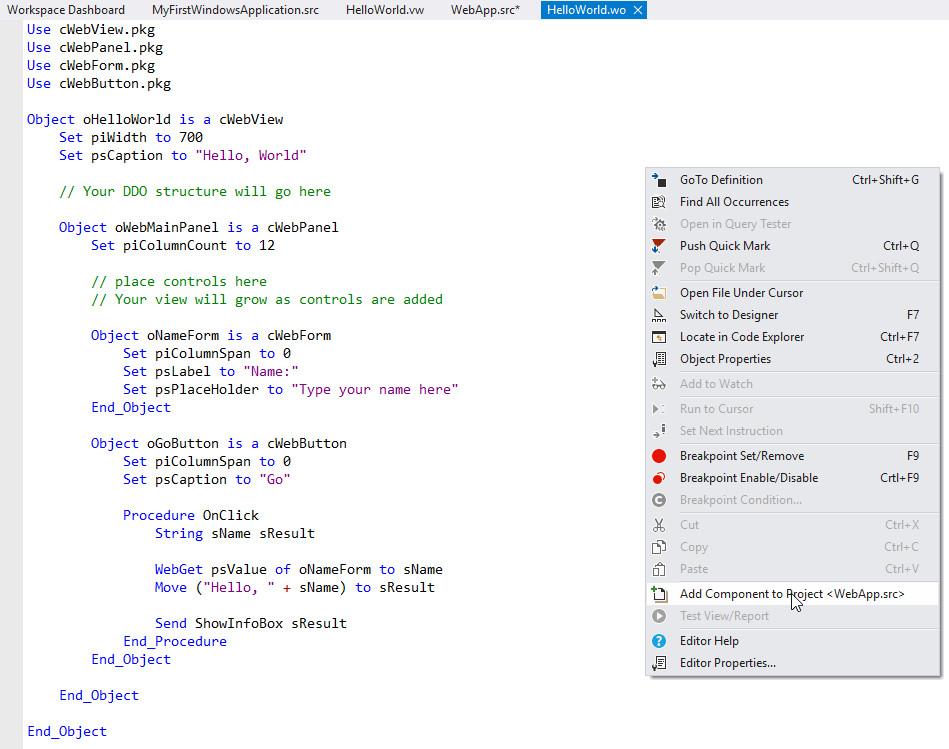
Right-click on any white space in the code editor of HelloWorld.wo and select Add Component to Project from the context menu.
-
Click on the Run button on the Studio's toolbar. The Studio will compile, then run your project.
When the application runs, your browser should display the http://localhost/QuickStart/Index.html page.
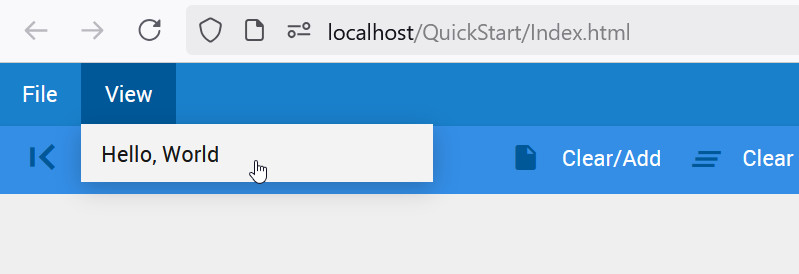
Click on the Views menu and notice that the view's menu item now correctly reads Hello, World.
-
Click on Hello World to open the view.

-
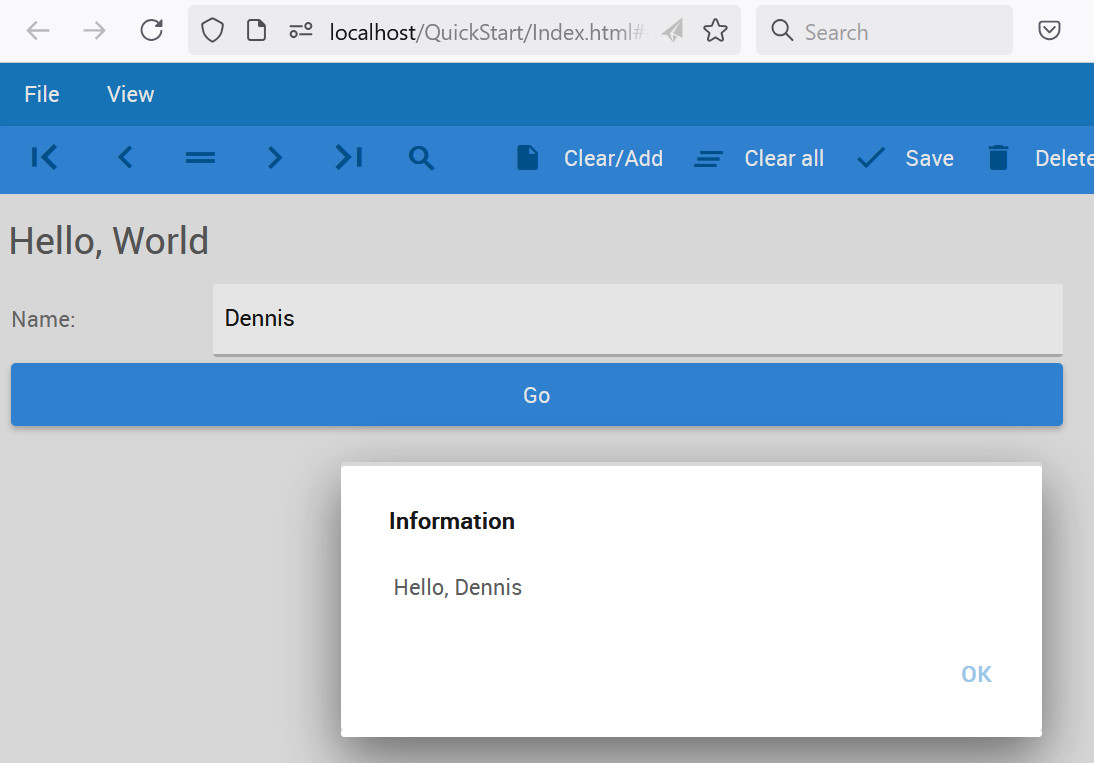
Type your name into the form labeled Name (replace Type your name here with your name), then click the Go button.
You will see "Hello, {Your Name}" in the message box that pops up.
The result will look like this:
Close the browser tab to close the application. Return to the Studio and click the Stop Debugging button in the studio to stop the debugger.