Creating Your First View
Now, let's create a view.
View
Views are one of the most commonly used components in Windows programs. They are used to create data entry screens and most other types of "screens" or "forms".
Creating a "Hello, World" view
We are going to illustrate some basic DataFlex Windows application development techniques using a variation of the well-known "Hello, World" program.
The view you will create will be very simple, with two form controls and a button. The first form will be labeled Name and the second form Result. The user will type his or her name into the Name form and click the button. The name will then be added to "Hello, ", resulting in "Hello, John" for example. This result will be placed in the second form.
-
Click the Create New button on the Studio toolbar. In the Create New... dialog, click the View / Report tab and double-click the Data Entry View icon.
-
In the "Create a New Data Entry View" dialog, enter
oHelloWorldas the object name. Notice that the filename automatically changes toHelloWorld.vwas you type the object name. Accept the default directory path (the AppSrc folder in the QuickStart workspace). Click OK.
You will now see the outline of a new view in the Studio's Windows Designer. It should look something like this:
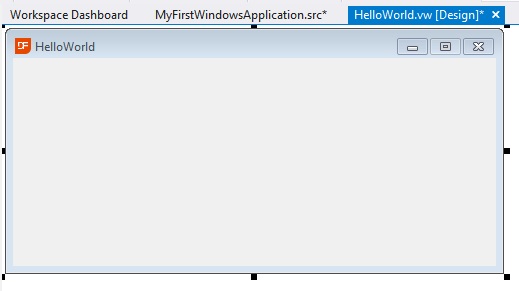
- Take a look at the Workspace Explorer window. If Workspace Explorer is not open, click the Workspace Explorer icon on the Studio toolbar.

The Workspace Explorer is a docking window that lists the current project and components included in the current project by type. Read more in the Workspace Explorer topic in the Studio book. By default, it is located on the right side of the Studio.
The Current Project is a key concept in the DataFlex Studio that affects almost everything you do in the Studio. The current project is the project that is compiled, run and debugged in the Studio, even if you are working on components that are not part of that project. When creating new components, they are added to the current project by default. Read more in the Workspace Explorer topic.
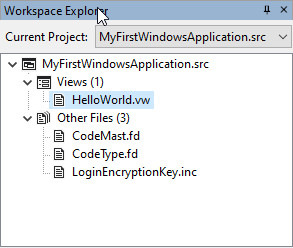
- In Workspace Explorer, you should see
MyFirstWindowsApplication.srcas the Current Project. ExpandMyFirstWindowsApplication.src, then expand Views. You can see thatHelloWorld.vwhas been added to the project.
If you expand Other Files, you will see all other files that are currently part of the project.
- Click the Class Palette button on the Studio toolbar.
This will bring up the Studio's Class Palette.
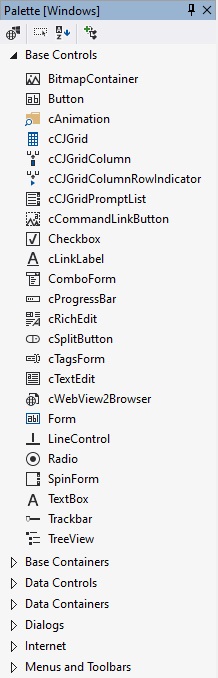
The Class Palette is a docking window that lists the controls available for use in the Studio for the current workspace. It is separated into different groups of controls based on usage and functionality. Since you are working on a Windows project, by default the Class Palette only shows controls usable in Windows applications.
The Class Palette is fully customizable. Read more in the Class Palette topic in the Studio book.
-
Drag and drop two
Formcontrols from the Base Controls group on the Class Palette onto the blank view. -
Drag and drop a
Buttoncontrol from the Base Controls group on the Class Palette onto the view. -
Select the top
Formcontrol, then, while holding down theCtrlkey, select the otherFormcontrol. Right-click, select Align, then Left from the context menu. This will align the two forms so that their left edges are the same distance from the left edge of the view.
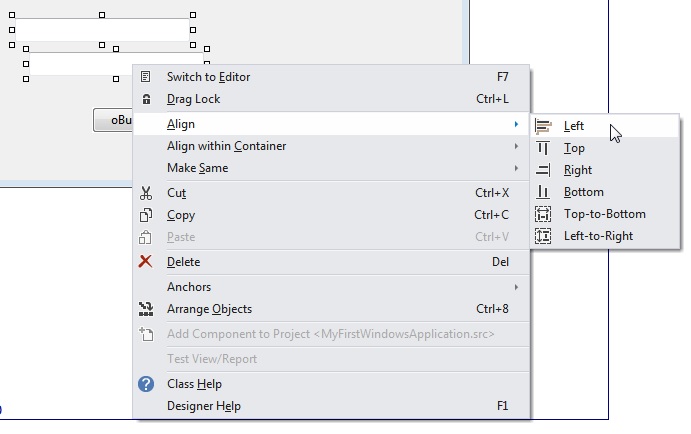
-
Select the
Buttoncontrol, right-click, select Center, then Horizontally from the context menu. This will center the button horizontally on the view. -
Click the Run button on the Studio toolbar. The Studio will compile, then run your project. When the application runs, click the View menu and then HelloWorld to open the view. Your running program will look like this:
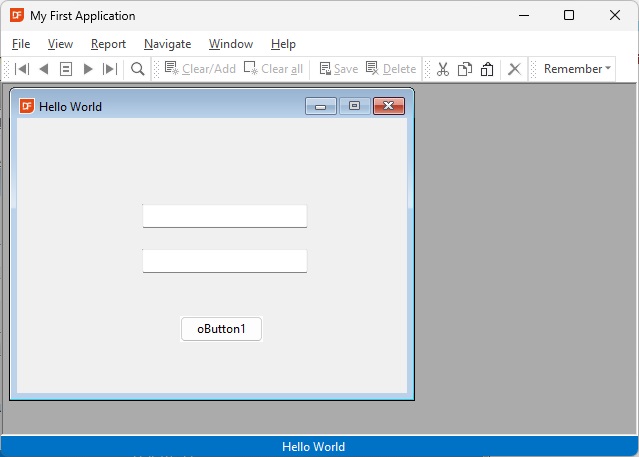
You can type text into the two form controls and click the button (although nothing happens when you do). Close the application.
-
Select the top
Formcontrol in the Windows Designer or Code Explorer and make sure the Properties window is open. Change the Object Name tooNameForm. The Object Name is at the top of the Properties window and labeled Object.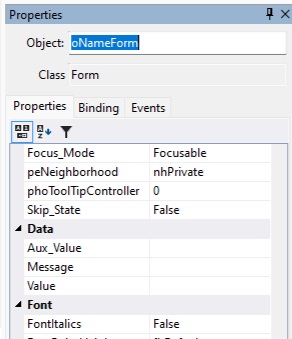
Object names are useful; names such as
oForm1andoForm2are not nearly as meaningful asoNameFormandoResultForm. In a more complex view, with many objects, meaningful names save time. We recommend using the prefixofor objects. Read more about DataFlex naming conventions in the Language Guide. -
In the Properties window, change the following for the top form:
Label→NameLabel_Col_Offset→0Label_Justification_Mode→JMode_Right
Click in the value column for
Label_Justification_Modeto use the combo that shows the enumeration list. The Studio displays different editors for each property based on the property type.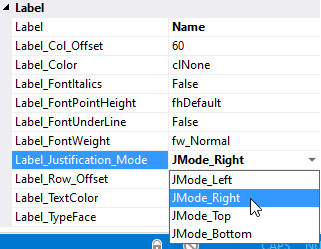
Changing
Label_Col_Offsetfrom 60 to 0 andLabel_Justification_ModetoJMode_Rightaligns the label directly to the left of the form control, regardless of the length of the label.Tip: You can see the documentation for any property by selecting the property in the Properties window and pressing
F1. This will open the DataFlex help for the selected property.The Properties window is used to view and edit property values for the selected object, class or table in the Studio's designers, such as the Windows Designer and Code Explorer.
Notice that all property values that have been modified from their defaults (as set in the object's class) are shown in bold. These are also the only properties that are written out to the code of the current source file.
To reset a property value to its default, right-click on the property name column in the Properties window and select Reset Value.
-
Click the bottom
Formcontrol. Change:- Object Name →
oResultForm - Label →
Result - Label_Col_Offset →
0 - Label_Justification_Mode →
JMode_Right
- Object Name →
-
Click the view object (click the view's background or the caption bar to select it). Change the view's
LabeltoHello, World!. -
Click the
Buttonobject. Change its Object Name tooGoButtonand itsLabeltoGo.The view should now look like this in the Studio:
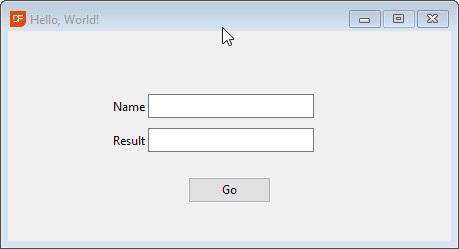
-
Double-click
oGoButtonin the Windows Designer or Code Explorer. This opens the code editor and displays the code forHelloWorld.vwwith the cursor on the button's object declaration line of code.
Navigating between views in the Studio
There are multiple ways to navigate between open views in the Studio. Double-clicking an object in the Windows Designer or Code Explorer opens the code editor at that object's code. You can also click the Toggle between Code Editor and Designer Views toolbar button to switch between Designer and Code Editor (this does not jump to a specific object).

To switch back to the Windows Designer, use the same toggle button or press F7 to toggle between the designer and the code editor for the current file.
Tip: You can cycle through all open views with Ctrl + Tab and Ctrl + Shift + Tab.
If you have many files open, consider leaving the File Navigator window open as a docked window. If the File Navigator is not open, click the File Navigator toolbar button.

Tip: If you double-click any file in Workspace Explorer: - If the file is not open, it will open. - If the file is open but not active, it becomes the active window. - If the file is already active, it toggles between code editor and designer (if the file has a designer).
If the main Studio tab row overflows, tabs will scroll. You can also configure the Studio (Tools > Configure Studio...) to display multiple rows of tabs. For more information about navigating the Studio, see the Studio help book.
- You will now add code to the
oGoButtoncontrol.
A Button control typically uses the OnClick event, which fires when the button is clicked. When you drag and drop a button onto a component, the outline of Procedure OnClick is already declared for you. If this procedure is empty, nothing will happen when the button is clicked.
Type the following lines of code inside the already declared Procedure OnClick. If you are new to the Studio, typing the code (rather than copy/paste) lets you experience the Studio's CodeSense features (contextual suggestions, auto-completion, etc.).
The first line of code is:
String sName sHello sResult
This declares three local string variables: sName, sHello and sResult.
Variable scope: the scope of a local variable is limited to the method (procedure or function) in which it is declared. You can assign and access these variables only within that method. Referencing variables outside their scope causes a compiler error.
Variable names: use meaningful names. We recommend the prefix s for string variables. See the Language Guide for naming conventions.
CodeSense: while typing, CodeSense may display context-sensitive lists. Manually invoke CodeSense with Ctrl+Space. Learn more: CodeSense.
Next line of code:
Get Value of oNameForm to sName
This reads the value of the oNameForm Form control into the string variable sName. The syntax for fetching a property's contents is:
Get {PropertyName} of {ObjectName} to {VariableName}
CodeSense tips:
- Typing get Value shows parameter info for the Value property.
- Typing get Value of shows object names (you can select oNameForm).
- Typing get then pressing Ctrl+Space shows Browse Objects; drill down to select Value.
Next line:
Move "Hello, " to sHello
This initializes sHello to "Hello, ".
Syntax for setting a variable:
Move {Value} to {VariableName}
Note: uninitialized local string variables default to "". It's good practice to explicitly initialize variables.
Next line:
Move (sHello + sName) to sResult
This concatenates sHello and sName and moves the result to sResult.
Next line:
Set Value of oResultForm to sResult
This sets the Value property of oResultForm to the contents of sResult.
The syntax for setting an object's property is:
Set {PropertyName} of {ObjectName} to {VariableName}
The completed code should look like this:
Object oGoButton is a Button
    Set Location to 93 94
    Set Label to "Go"
    // fires when the button is clicked
    Procedure OnClick
        String sName sHello sResult
        Get Value of oNameForm to sName
        Move "Hello, " to sHello
        Move (sHello + sName) to sResult
        Set Value of oResultForm to sResult
    End_Procedure
End_Object
Consider adding blank lines to separate logical blocks for readability.
Commenting code: comments start with // and continue to the end of the line. Example:
Object oGoButton is a Button
    Set Location to 93 94
    Set Label to "Go"
    // This method reads the user's name and displays "Hello, Name"
    Procedure OnClick
        String sName sHello sResult
        Get Value of oNameForm to sName
        Move "Hello, " to sHello
        Move (sHello + sName) to sResult
        Set Value of oResultForm to sResult
    End_Procedure
End_Object
Tip: Toggle comment/uncomment for selected lines with Ctrl + K.
-
Test the completed view.
-
Click the Run button on the Studio toolbar. The Studio will compile, then run your project.
- When the application runs, click the View menu and then HelloWorld to open the view.
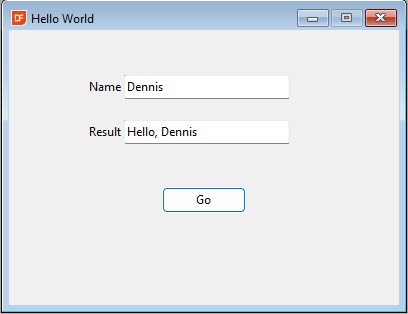
- Type your name into the form labeled Name, then click the Go button. You will see
Hello, {Your Name}in the Result form.
The result will look like this:
Close the program.
-
Fix the View menu item label (it currently shows "HelloWord" instead of "Hello, World!").
-
If it isn't open, open
MyFirstWindowsApplication.srcin the Windows Designer (double-click it in Workspace Explorer). - Click the View menu, then the HelloWorld menu item.
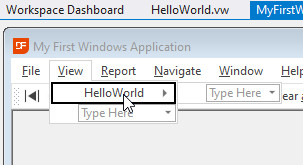
- Click the selected HelloWorld menu item once (do not double-click). This makes the menu item text editable. Change the menu item text to
Hello, World!.
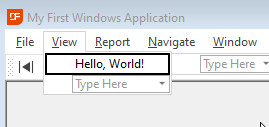
Alternatively, select this menu item object in Code Explorer and edit the Label in the Properties panel, or edit the Label line in the source code.