Consuming a Web Service from a Web Application
In this section, you will create a web page that calls the Greeting function in the Greeting Web Service that you created in the Creating Your First Web Service tutorial.
The web page you will create will be very simple, with two forms and a button. The first form will be labeled Name and the second form Result. The user will type their name into the Name form and click the button. The name will then be passed to the Greeting Web Service function, and the returned string will be displayed in the Result form.
Important!
This section assumes that you have completed the Creating a Web Service Client Class section. You cannot complete this section without first generating a Web Service client class. If you have not done so, switch to Creating a Web Service Client Class now and return here when you have completed that step.
This section also assumes that you have completed the Creating Your First Web Application book.
Tip
If you have worked through the entire Quick Start book up to this point, your QuickStart workspace will contain at least one Windows application and a web application.
-
Ensure that the Current Project in Workspace Explorer is WebApp.src, not a Windows application. If you try to create a Web object, such as a WBO, and the current project is a Windows application, the Studio will display an error message and will not allow you to create the component.
-
Click on the Create New button on the Studio’s toolbar. Click on the Web Object tab of the Create New... dialog. Double-click the Web View icon.
-
The "Create a New Web View" dialog will open. Enter oCallGreetingWebService as the object name. The filename will automatically change to CallGreetingWebService.wo as you type the object name. Accept the default directory path (the AppSrc folder in the QuickStart workspace). Click on the Ok button.
You will now see the source code of the new web view in the Studio.
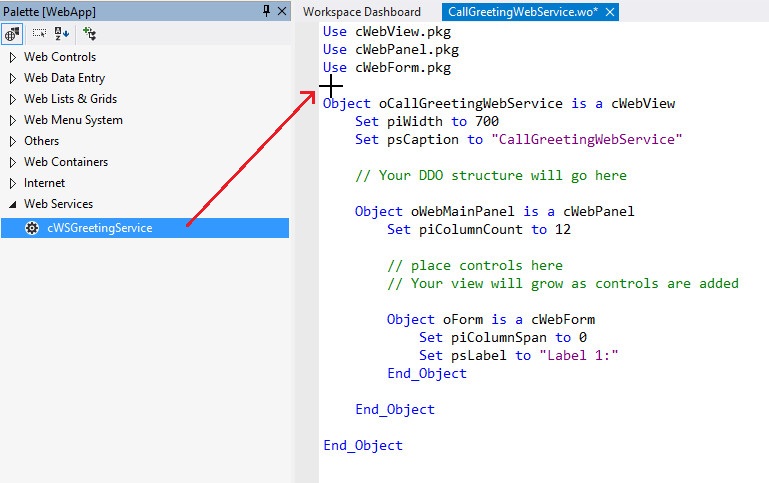
- Drag and drop a cWSGreetingService control from the Web Services group on the Class Palette onto the code editor, above the existing web view object.
Tip
It can be a bit tricky to get the placement of the control just right when dragging and dropping them into the code editor. If this happens, try starting with some extra blank lines between controls. If the drag and drop goes wrong, you can always hit the undo button on the toolbar (or press Ctrl+Z) and try again.
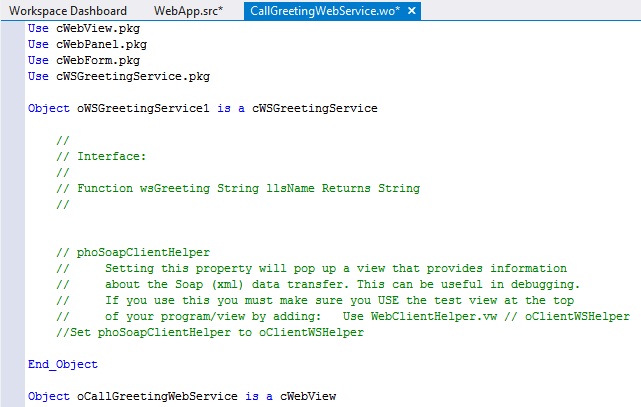
- The completed code should look like the image below. There is more code in the oCallGreetingWebService object below what is shown, but this is how the dropped web service object and associated Use statement should look and where they should be located:
-
Press F7 to switch to the WebApp Designer.
-
Drag and drop a cWebForm control from the Web Data Entry group on the Class Palette onto the WebApp Designer, below the existing form object. Below that, drag and drop a cWebButton control.
-
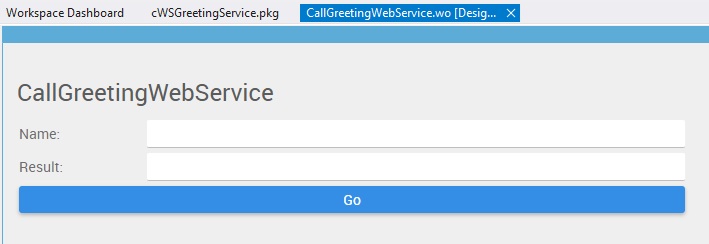
Change the Name of the top cWebForm control to NameForm and its Label to Name:.
-
Change the Name of the second cWebForm control to ResultForm and its Label to Result:.
-
Change the Name of the cWebButton control to GoButton and its Label to Go.
The result should look like this:
-
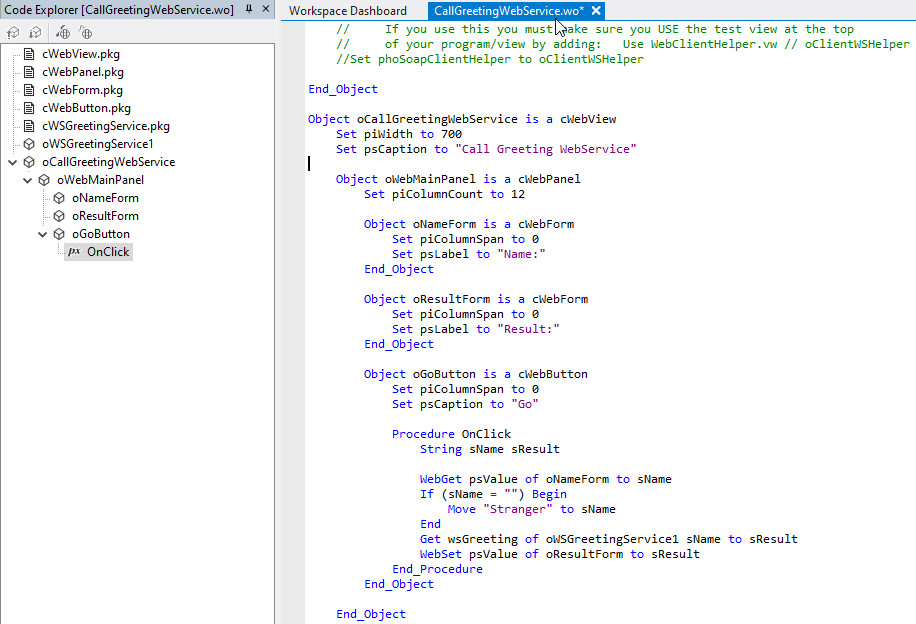
Next, you will add some code to the existing Procedure OnClick in the oGoButton object. The code here will accept a name, call the wsGreeting web service function, and return the result of wsGreeting.
-
The first line of code is:
String sName sResult -
The next line of code is:
WebGet psValue of oNameForm to sNameThis line of code gets the current value (remember from WebGet vs. Get, Debugging Web Apps to use WebGet and not Get) of the oNameForm to the sName variable.
-
The next block of code is:
If (sName = "") Begin
    Move "Stranger" to sName
End
This block of code moves "Stranger" to sName if no name was passed to the function.
-
The next line of code is:
Get wsGreeting of oWSGreetingService1 sName to sResultThis code line makes the call to the wsGreeting function of the oWSGreetingService1 Web Service object. It passes the name in sName to wsGreeting and receives the return argument in sResult.
-
The last line of code is:
WebSet psValue of oResultForm to sResultThis line of code sets the current value of the oResultForm to the result of the web service call.
-
The completed code should look like this:
-
Now test your completed Web View.
Click on the Run button on the Studio's toolbar. The Studio will compile, then run your project. When the application runs, your browser should open http://localhost/QuickStart/Index.html.
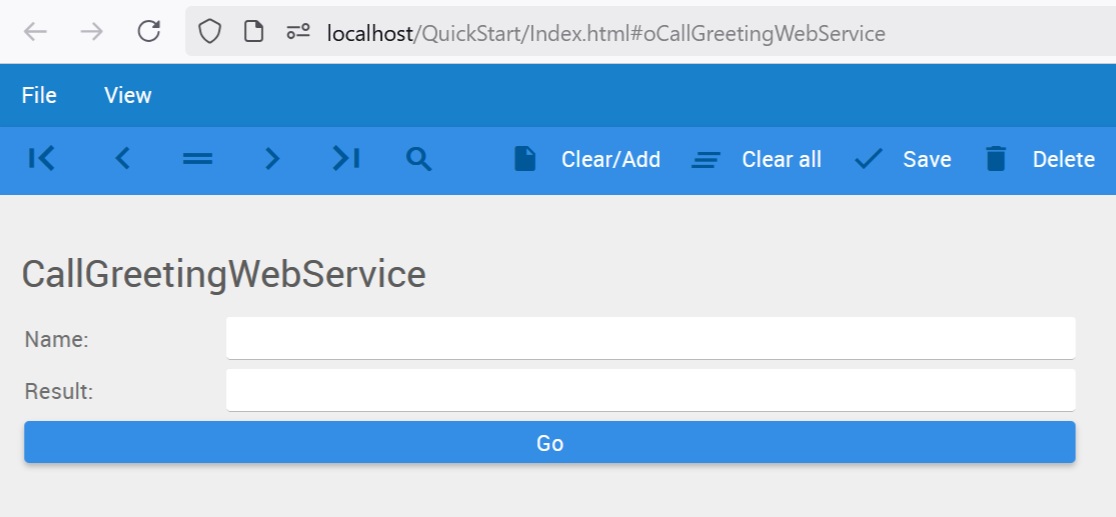
Click on the Views menu and then CallGreetingWebService view to open the new web view (see Creating Your First Web View to see how to change the web view's name in the menu).
-
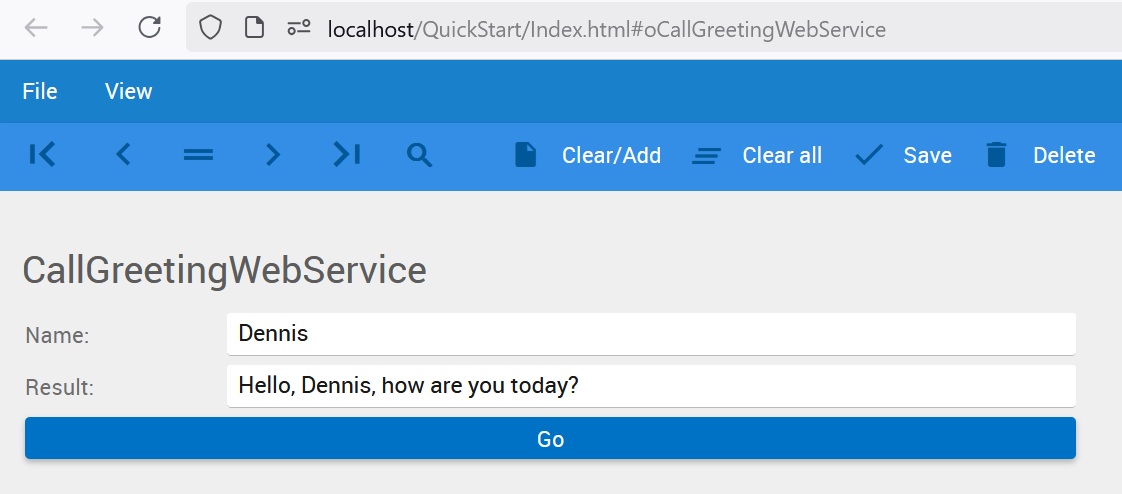
Type your name into the form labeled Name, then click the Go button.
You will see "Hello, Dennis, how are you today?" in the form labeled Result:
-
Close the browser tab to close the application. Return to the Studio and click the Stop Debugging button in the studio to stop the debugger.
As you can see, calling a Web Service from a DataFlex Web application is simple and completely transparent; any complexities have been handled by Studio.
To learn more about layouts in web applications, see Web Application Flow and Positioning and Layout of Controls.