Creating a Web View
Next, you will create a data entry Web View in the Studio, using the "Web View Wizard".
Tip
Ensure that the Current Project in Workspace Explorer is a web application, not a Windows Application. If you try to create a Web object, such as a Web View, and the current project is a Windows application, the Studio will display an error message and not allow you to create the component.
Steps to Create a Web View
- Click on the Create New button on the Studio’s toolbar.
- Click on the Web Object tab of the Create New... dialog.
-
Double-click the Web View Wizard icon.
-
Read the explanations on the first wizard page about what this wizard will do and click Next.
-
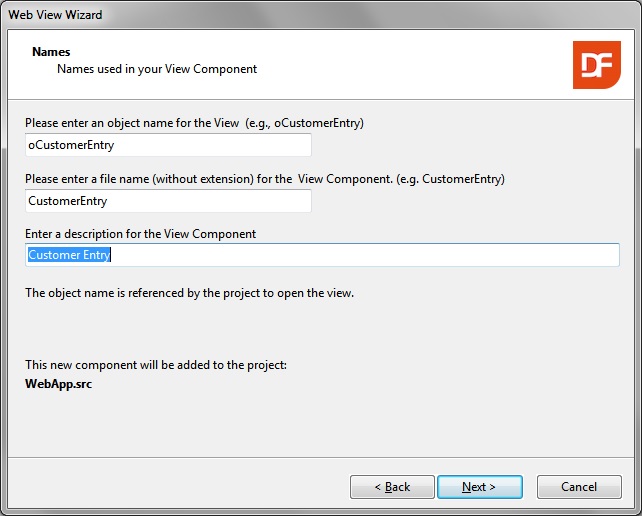
On the Names wizard page:
- Enter
oCustomerEntryas the object name, CustomerEntryas the filename, andCustomer Entryas the description.-
Click Next.
-
On the "Web View Style" wizard page, leave the default selection of Create a Simple Form Web View, then click Next.
-
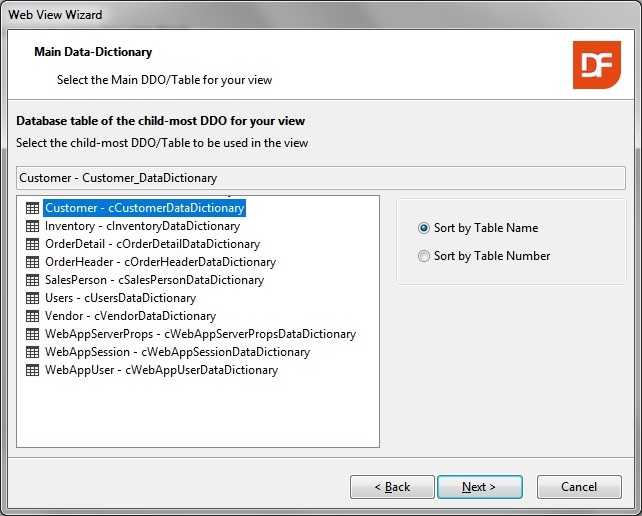
On the "Main Data-Dictionary" wizard page:
-
Click on Customer - Customer_DataDictionary to select it as the data dictionary to be used, then click Next.
-
On the "Entry Fields" wizard page:
- Click on the Add button to add the
Customer_NumberandNamefields to the web view. - Click the Tab Page button to add a Tab Page.
- Next, add
Address,City,State,Zip,Phone_Number,Fax_Number,EMail_Address, andStatus. - Then add another tab page.
- Next, add
Credit_Limit,Purchases,Balance, and yet another tab page. - Lastly, add
Comments. -
The completed list of fields should look like this:

Click Next. -
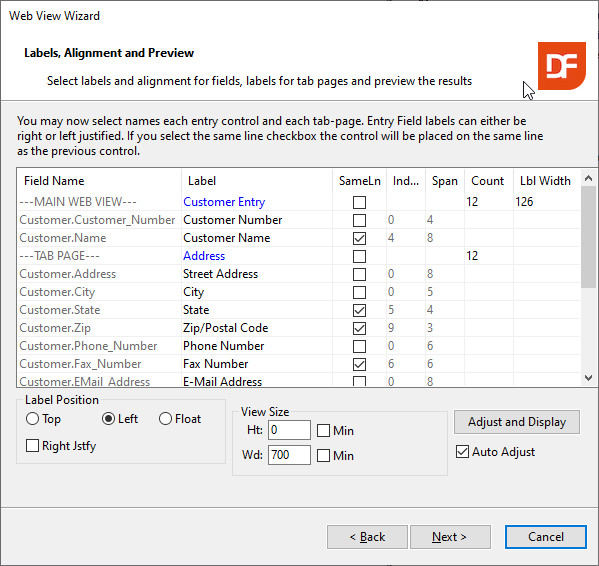
On the "Labels, Alignment and Preview" wizard page:
- Rename the 3 Tab Page Labels to
Address,Balances, andComments. - Add a checkmark to the SameLn checkboxes next to
Customer Name,State,Zip/Postal Code, andFax Number. - At the bottom of the page, change the Label Position radio to Left.
-
The completed list should look like the 2 images below:

At any time you are working on this page, you can click on the Adjust and Display button to get a preview of what the finished web view will look like.
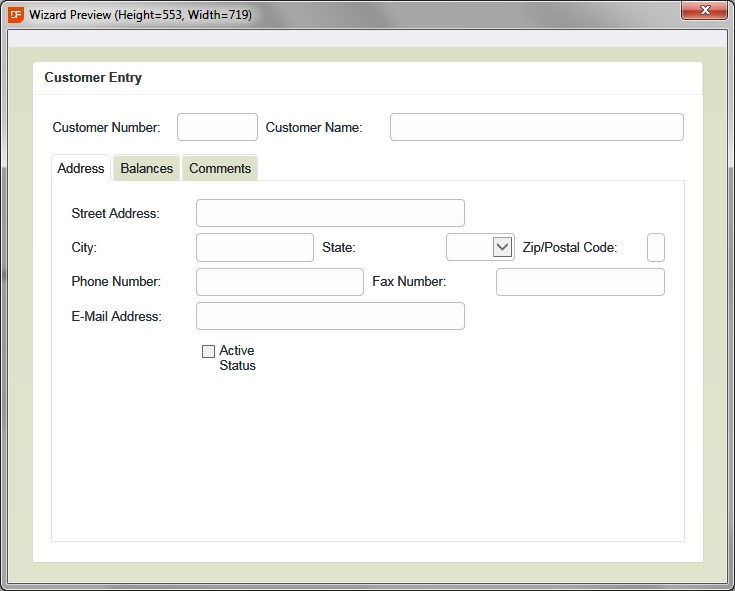
Click the X in the upper right-hand corner to close this preview and return to the wizard. -
Click Next. Click Finish on the last wizard page.
You will now see the source code of the new web view in the Studio. -
Now, let's test your completed Web View.
Click on the Run button on the Studio's toolbar. The Studio will compile and then run your project.
When the application runs, your browser should display the http://localhost/QuickStart/Index.html page.
Click on the Views menu and then Customer Entry to open your new view. -
You can now use any of the web application's menu and toolbar buttons to find, save, and delete records.